Photo analysis with Microsoft Cognitive Services, using Makeblock CamVision extension
Jan 18, 2017 karen's Blog
 This is a guest blog by MIT Master Trainer David Tseng of CAVEDU Education.
This is a simple project combining App Inventor and Microsoft Cognitive Services :Computer Vision API. The app can upload a picture to Microsoft Cognitive Services :Computer Vision API after the photo is taken, then get the information below:
- Description
- Foreground color
- Background color
- tags (json format, can easily put into Listpicker, Listview or Spinner)
Notice:
Your phone's camera will open when the [Prepare] button is pressed (although you can't see a preview, it is open). Other programs like QRcode Scanner which will also uses camera will now be unable to be used. You will have to close this app before using other camera-related apps.
How It Works
In the photo below, you can see besides a cat laying on a small table, there are many obstacles in the background, which makes it quite difficult to separate the main object (cat) and the background.

The result:
- Description (a cat laying on a bed)
- Foreground color (grey)
- Background color (grey)
- Tags (indoor, cat, wall, laying)

How to Apply for API Key from Microsoft Cognitive Services
Please log in to Microsoft Cognitive Services main website with your Microsoft account (MSN is still working, haha~) or sign up for one.
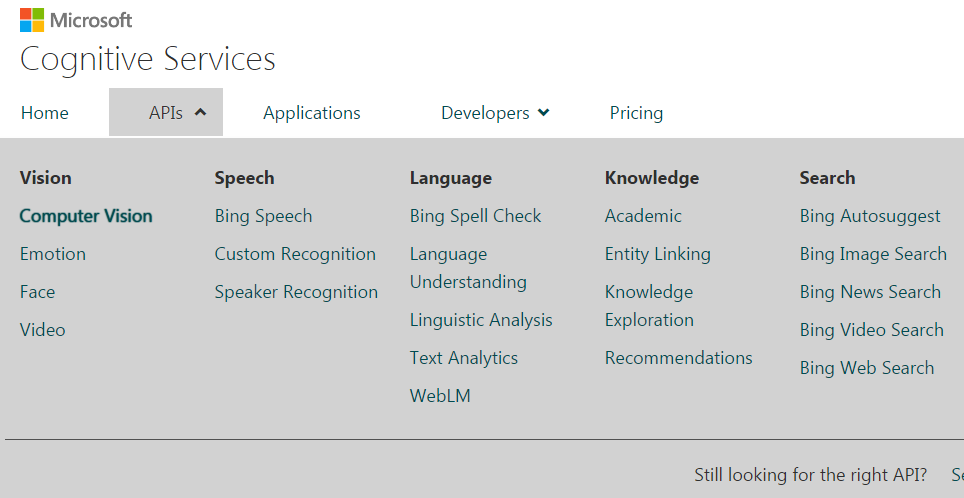
Please click APIs -> Computer Vision, and finally click Get Started for Free.
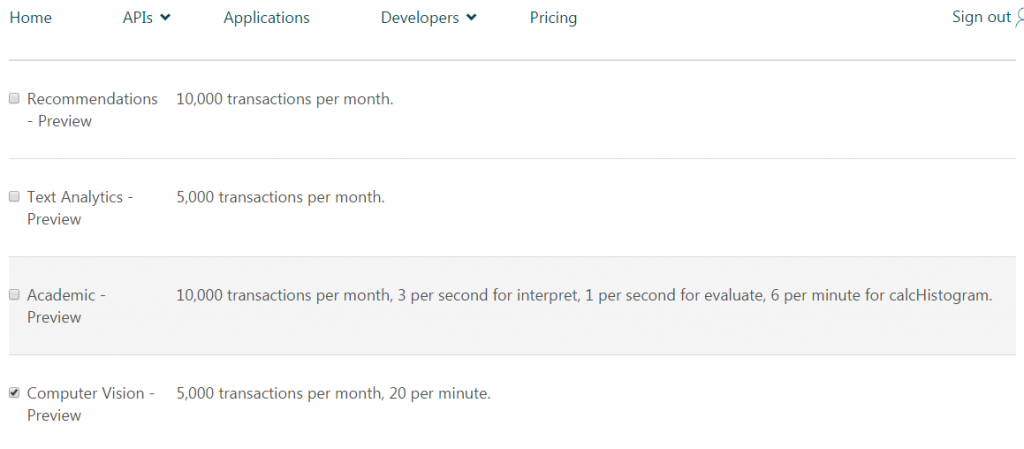
Please check Computer Vision-Preview; you can see the limit of the free trial is 5,000 transactions per month, 20 per minute (quite enough I think).
When you are done, you can see there are two Keys under the Computer Vision-Preview section. Please click Show to see the keys. You will need to use these key values in to your App Inventor project (see below). Either Key1 and Key2 are ok to use.
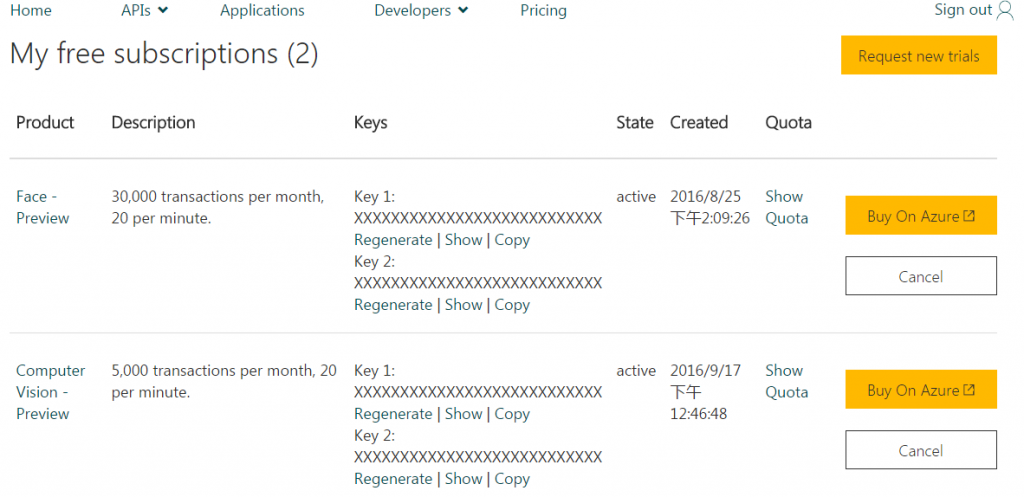
You can click Show Quota to check how many calls you've used.

How To
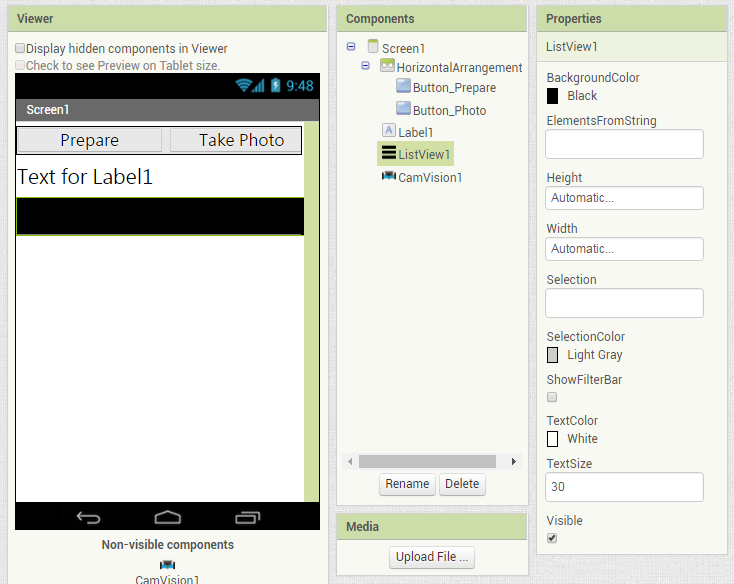
Start a new project in App Inventor. Please import Makeblock's CamVision extension into your App Inventor project or import our sample project directly.Designer
- Button_Prepare: Click to open camera, set API key.
- Button_Photo: Click to take picture.
- Label: Show result from Microsoft Computer Vision API, including description, foreground color, background color.
- ListView: Show result from Microsoft Computer Vision API: tags. You can put them into Spinner or ListPicker instead.
- CamVision: Upload picture to Microsoft Computer Vision API and get the results.
Blocks
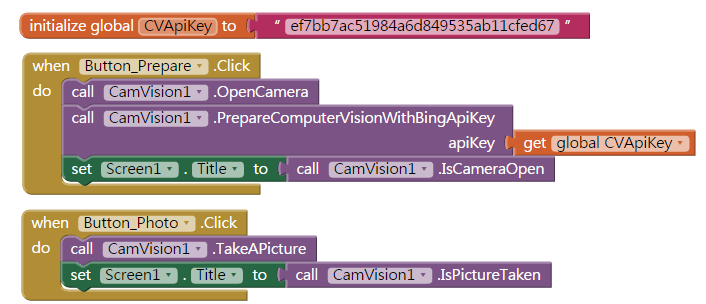
Step1:
Declare variable: CVApiKey using the Key value we got from Microsoft (above).
Clicking Button_Prepare will open the camera, prepare the API key and show a "True" on your Screen1.Title when the camera is successfully opened.
Then click Button_Photo to take a picture (the app will not show what you've taken on the screen). It will also show a "True" on your Screen1.Title when the picture is successfully taken.
Step 2:
After the picture is taken, the CamVision.AfterPictureTaken event should upload the picture to Microsoft Cognitive Services (CamVision1.SubmitPictureForComputerVision). After that, the CamVision.AfterComputerVisionResult event returns the information we want. Set the Label1.Text to the results. You can try get other information such as AnalyzeColor and FaceDetection as well.
- Description: DescriptionFromCV
- ForegroundColor: ForegroundColorNameFromCV
- BackgroundColor: BackgroundColorNameFromCV
- Tags TagsFromCV
 Please note that if you give a wrong API key value (either typing error or wrong API key), this app will not get the correct information.
MIT App Inventor


This work is licensed under a Creative Commons Attribution-ShareAlike 4.0 International License.
Terms of Service and Privacy Policy
Other inquiries: Email
GitHub: mit-cml
Accessibility: accessibility.mit.edu


