Heart Rate Monitor with Arduino/Genuino 101
Aug 8, 2016 karen's Blog
 This is a guest blog by MIT Master Trainer Jose Luis Nez
Nowadays, the number of connected devices available through the Internet has led to connected people. The infrastructure that supports all the communications between devices is also known as the Internet of Things(IoT).
The need to create apps that can handle IoT has contributed to the development of an extension for MIT App Inventor that provides an easy way to connect to devices.
This tutorial will teach you how to use the Arduino/Genuino 101 board to read data from a heart rate sensor using the Bluetooth Low Energy(BLE) component. If you don't have the original sensor you can emulate it by using a potentiometer or another analog sensor.
Requirements
- Arduino/Genuino 101 board
- LED
- Heart rate sensor, potentiometer or similar analog component
- Arduino IDE (https://www.arduino.cc/en/Main/Software) with libraries BLE and CurieBLE
The Circuit
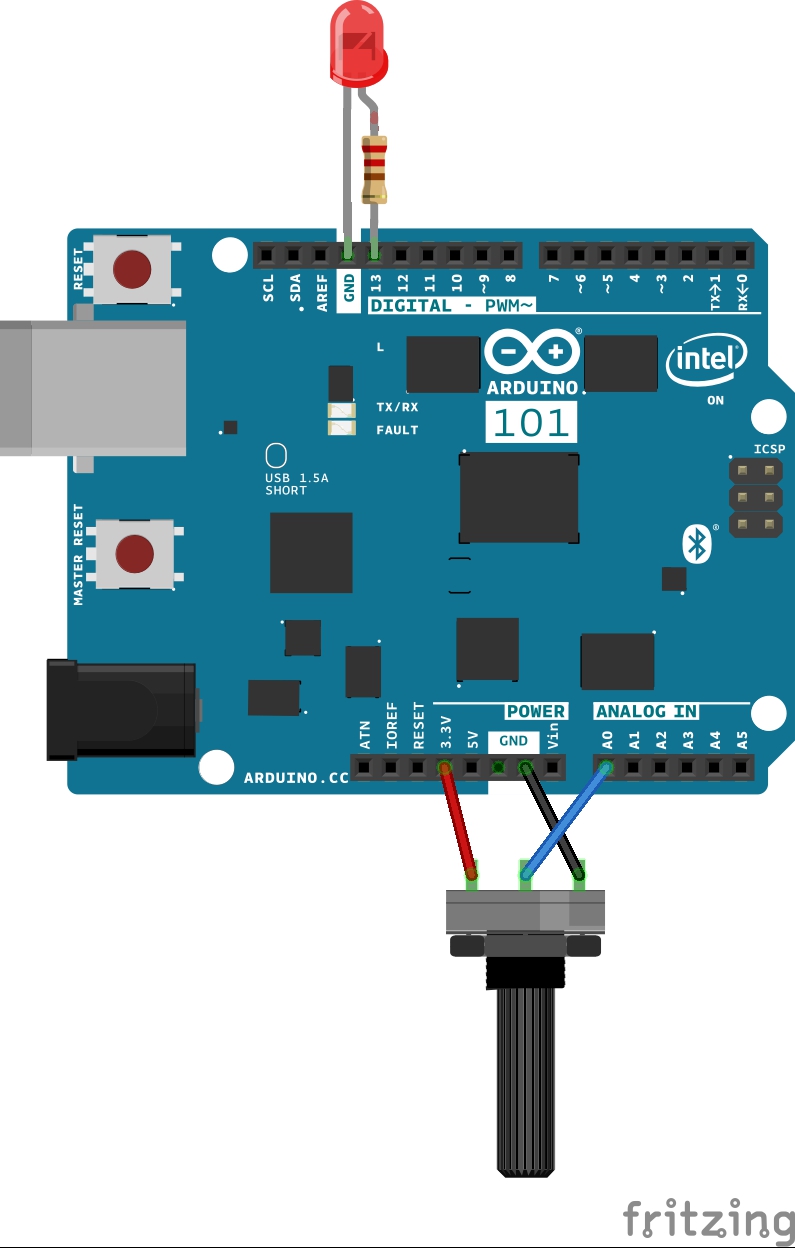
Arduino/Genuino 101 sketch
First, we will have to implement the standard Bluetooth Low Energy "Heart Rate Monitor" service using the Arduino IDE and loading a sketch into our board.
You can copy and paste the source code from: https://www.arduino.cc/en/Tutorial/Genuino101CurieBLEHeartRateMonitor.
The following points show the operating mode of the sketch:
- Declare the BLE peripheral device (our Arduino board) with its service and characteristic (heart rate sensor).
- Wait for incoming connection with a central device (our smartphone or tablet with Bluetooth).
- Switch on LED to indicate that the board is connected.
- Read the analog sensor updating the value when it changes.
- Switch off the LED when the connection finishes.
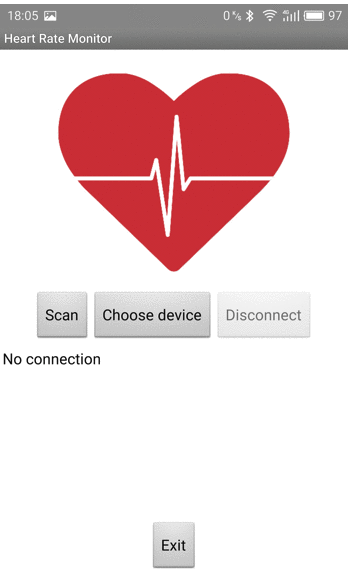
Designer view
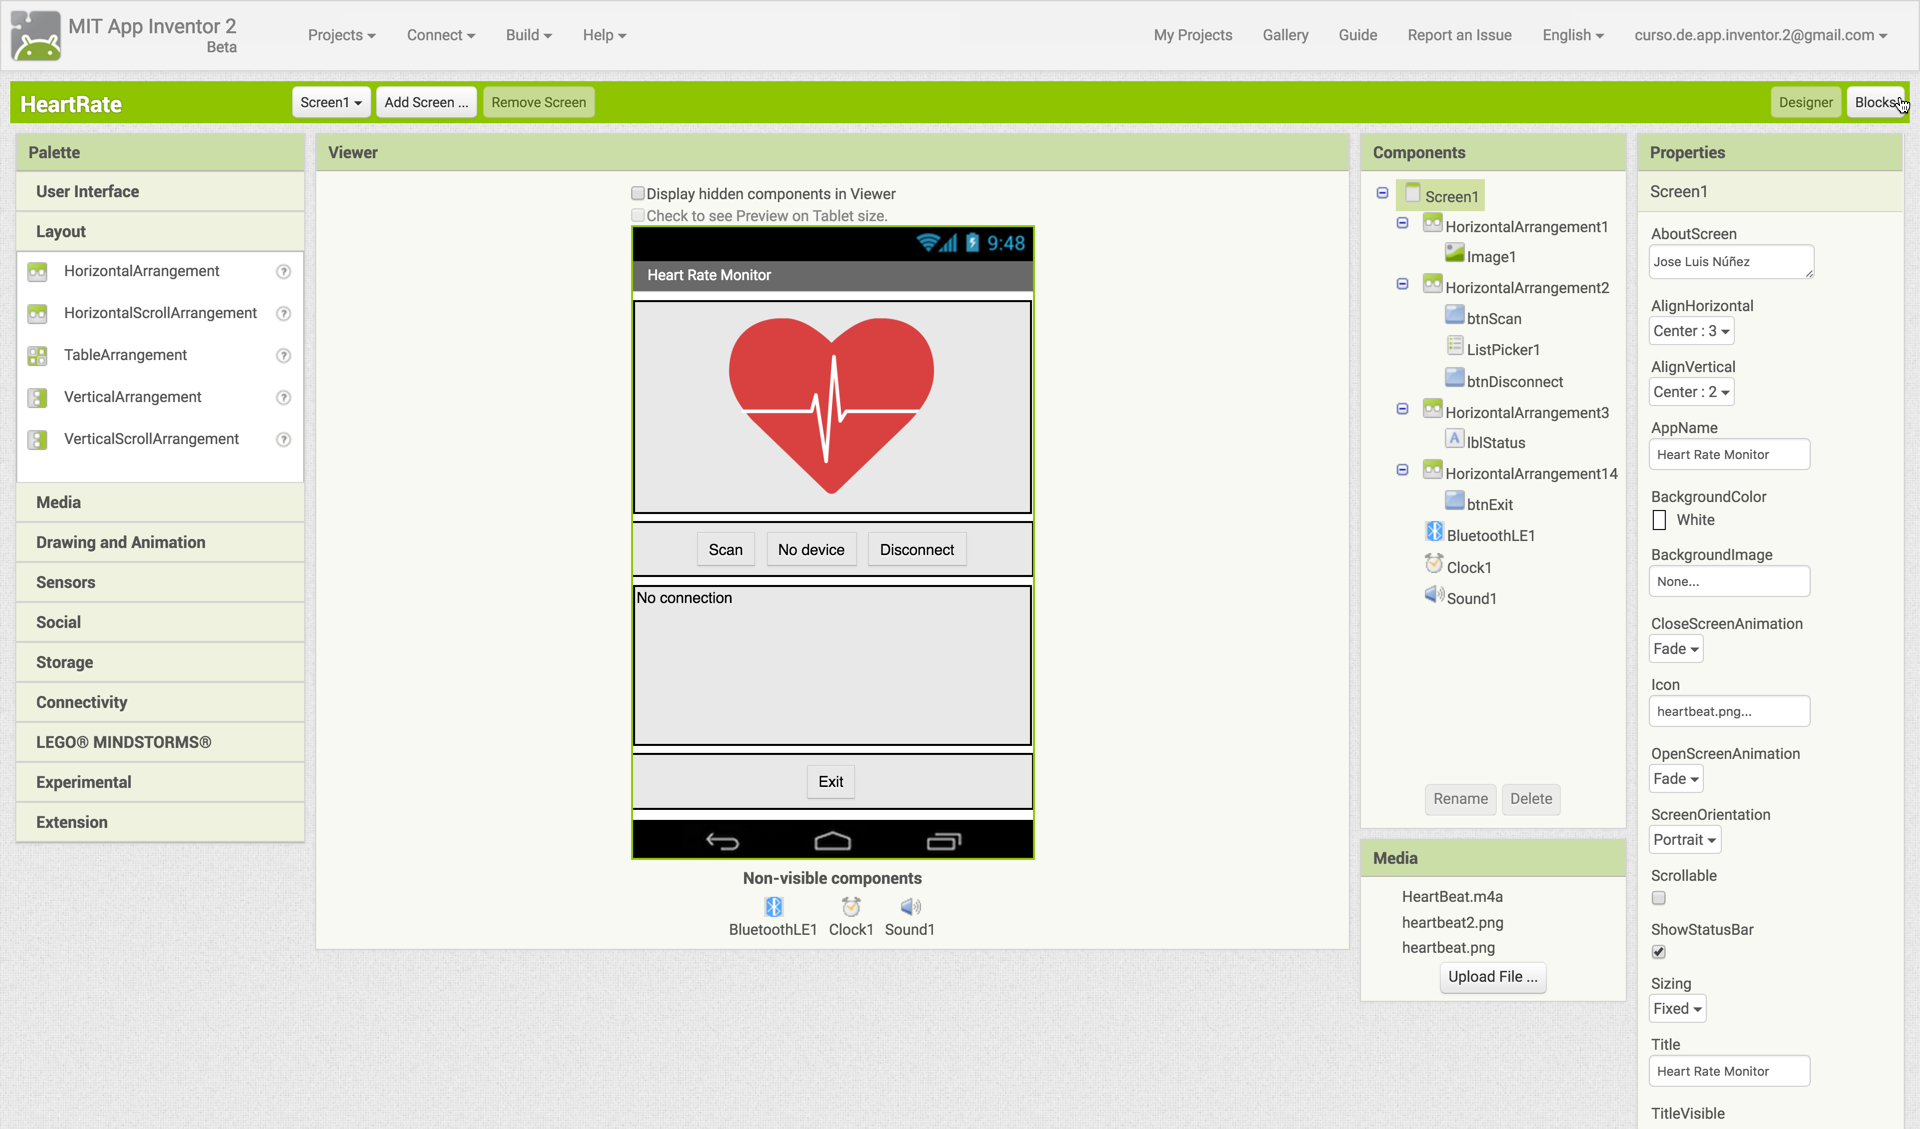
We will use the necessary arrangements to display an image of a heart that beats when the devices are bonded, a set of buttons and a label to show the status.
We will read data from the sensor updating the text of the label once devices are linked. We will have to import the Bluetooth LE extension to be able to receive the values from the sensor.
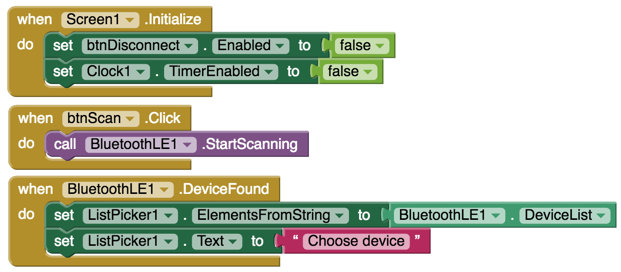
Blocks View
First, we will initialize three global variables to store the address of our Arduino/Genuino 101 board, the standard "Heart Rate Monitor" service and its characteristic UUIDs. If you don't know the meaning of these concepts, you should review them on the MIT App Inventor IoT reference page.

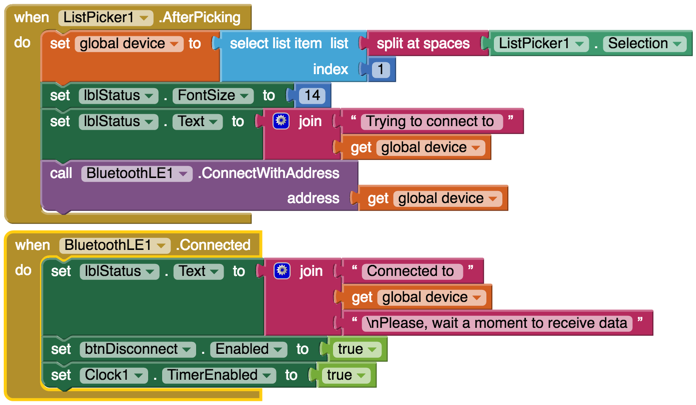
When the app starts, we will disable the button named "btnDisconnect" and the timer...it doesn't make sense if we don't have a link established. At first, the user will press the Scan button and will get a list of Bluetooth devices. We will use a list picker to select our Arduino/Genuino 101 board and connect to it.
If all goes well we will update the status on the screen using the label. We will also enable the Disconnect button to be able to disconnect from the peripheral device and the timer.
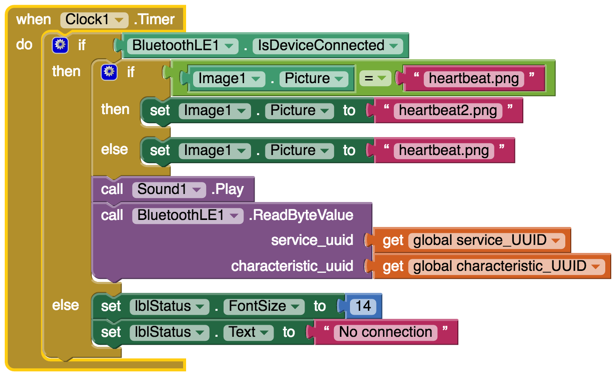
Every second, an event will trigger the clock and our app will check the connection. If all is OK, the app will play a sound of a heart beat and it will change the image while tries to get data from the sensor.
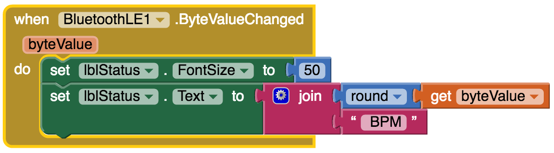
A ByteValueChanged event will be triggered when our app detects a change. The new value will be assigned to the text of the label. We will have to use the math round function to convert the byte to a whole number and remove the least significant 0.
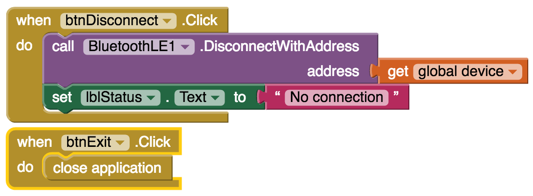
Finally, the buttons that will allow user to disconnect and exit...
That's all!
Happy inventing!
You can download the source code from this link:
https://drive.google.com/open?id=0B0k5c5YtPa8EZWRfZWFIbkY3MG8References:
https://www.arduino.cc/en/Tutorial/Genuino101CurieBLEHeartRateMonitor http://ai2.appinventor.mit.edu/reference/other/IoT.htmlMIT App Inventor


This work is licensed under a Creative Commons Attribution-ShareAlike 4.0 International License.
Terms of Service and Privacy Policy
Other inquiries: Email
GitHub: mit-cml
Accessibility: accessibility.mit.edu


