Step 1: Starting App Inventor 2 for the First Time
Before you begin, make sure you have access to the following things:
- A computer with Internet access and a modern browser.
- A Google account, like a gmail account (this is how you will log in to App Inventor) | Get a free Gmail account
NOTE: These instructions will take you away from this page as you go into App Inventor. Be sure to come back and follow the instructions in Step 2 for connecting to a device or emulator.
Log on to AI2 and create a new project
In your web browser, go to App Inventor 2 at http://ai2.appinventor.mit.edu/. If you are not currently signed in to your Google Account, you will be asked to sign in. App Inventor saves all of your projects to our server, under the name on your google account, so any progress you make now will be saved for the next time you open the program.
After signing in, if this is the first time you are using App Inventor 2, you will see a blank projects page.
- Click New on the left side, near the top of the page.
- Enter the project name HelloPurr (one word, with no spaces) in the dialog box that appears, then click OK.

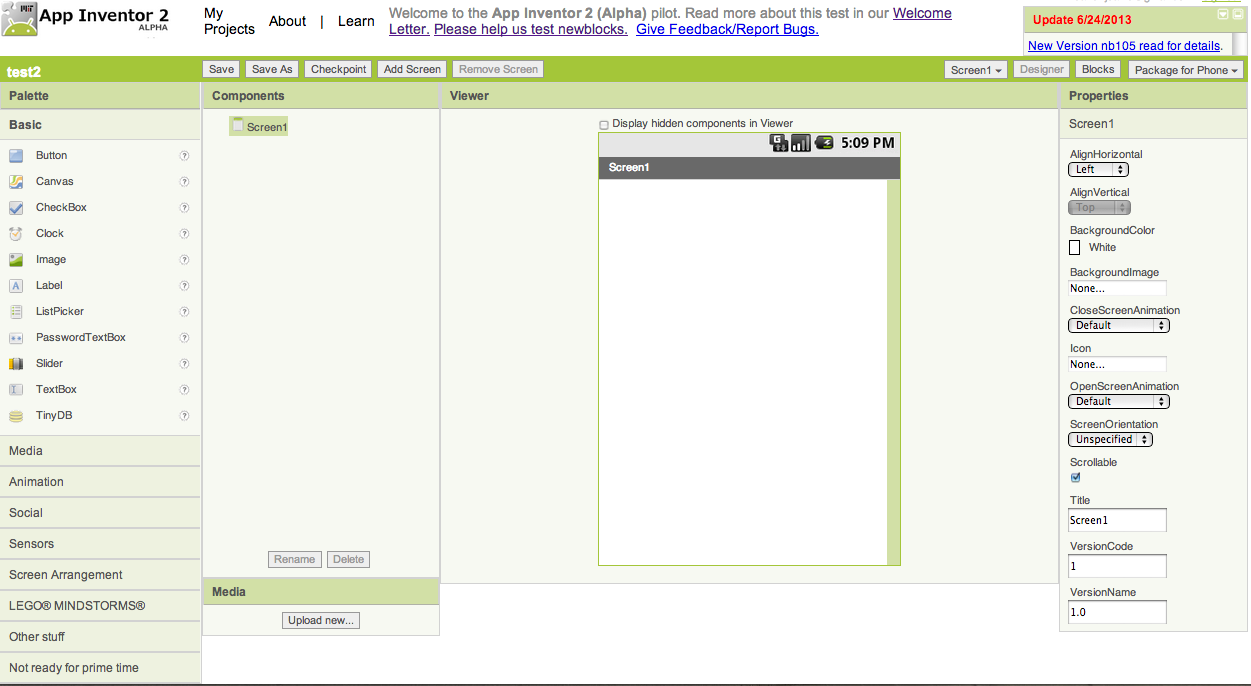
The browser will open the web page for your project. Currently, the Designer view, the place where you select components for your app and design the user interface is showing. It should look like this:
In addition to the Designer, there is also a view called the Blocks Editor, the place were you set the behavior of the app. This view can be accessed by clicking the button on the right side, near the top of the page labeled Blocks. Notice that there is a Designer button right next to the Blocks. Clicking this will bring you back to the Designer view. These views are linked: changes made in the Designer will be immediately reflected in the Blocks Editor.
The Blocks Editor window should look like this:

The large empty "canvas" space on the right side is referred as the work area, in which you place blocks to assemble the program.
On the left side, you may notice 3 outer palettes: Built-In, Screen1, and Any component. When maximized each of these palettes holds a set of drawers.
The Built-In palette contains the standard set of blocks that are available for every app you build (e.g., Control, Text, Lists etc.). The Screen1 palette contains specific blocks that are tied to the set of components that you have chosen for your app. The Any Component palette contains blocks that are tied to the components that you have chosen for your app and these blocks control all of one specific type of component. When you click any of these drawers, a scrollable list of blocks appears. To use one of the blocks you see, click and drag the block onto the screen

The Designer and the Blocks Editor both run from the browser and they are linked. Therefore, when you switch from the Blocks Editor view to the Designer view, all of your work will be saved and will still be there when you switch back. When you click the "Blocks" button, you will be switched to the Blocks Editor view. When a new Blocks Editor opens, it will contain all the blocks you programmed before you last closed the Blocks Editor.
As you build your app, you can do "live testing" on an emulator or an Android device. If you have an Android tablet or phone that you want to use while you develop apps, click 2A below. If you do not have an Android device, you can still see your app as you develop it, but with an on-screen "emulator" - to use the emulator, though, you'll have to download and install a piece of software on your computer. To build with the emulator, click 2B below.
Set up either an Android device or the Android emulator so that App Inventor can connect to it and show your app "live" while you build it.
| 2A. Build apps with Android Device | < STEP 2: Choose one > | 2B. Build apps with emulator |
| Back to Setup Menu | ||


