MIT App Inventor on Chromebooks
Many Chromebooks, including all Chromebooks since 2019, can run Android apps. This makes them attractive choices for working with App Inventor because you can use a single device both for creating apps in the browser and for running finished app as Android applications.
For school IT administrators: Some schools choose to disable the ability to run Android apps on their managed Chromebooks, which makes them unusable for App Inventor. See the link under Resources on how to control this feature for your managed Chromebooks and how to manage deployments of apps across your organization.
Initial Setup Instructions
Step 1. If you are unboxing a new Chromebook, you should use the “settings” app and go to the “About Chrome OS” item (usually the last item on the left-hand side of the window). There it will tell you the version of Chrome OS running on the Chromebook along with a “Check for Updates” button. Click the button. It will either tell you that your Chromebook is up to date or it will start the update process. It is possible that you may have to update multiple times. Once your Chromebook takes the update, again “Check for Updates” until your Chromebook says that it is up-to-date.
Step 2. Turn on the Google Play Store setting to enable the use of Android apps. To do this, search under settings for Play Store and you should see the option to turn on the store. as shown below. If you do not see Google Play store under the settings list, make sure you are running the latest version of Chrome OS. If your Chromebook is managed by a school or business, you may need to discuss with your IT administrator about enabling this feature if it has been disabled. If you are still unable to install Android apps from the Play Store, your Chromebook is unable to run apps and is not usable with App Inventor.
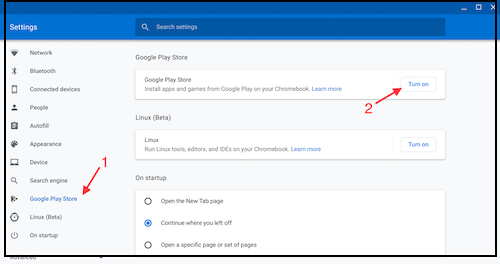
You may have already set up Play Store access when you first started your Chromebook. In this case, you will only see an arrow indicating additional settings. If so, jump to step 4.
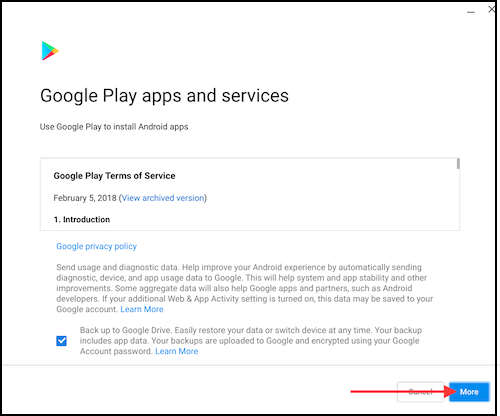
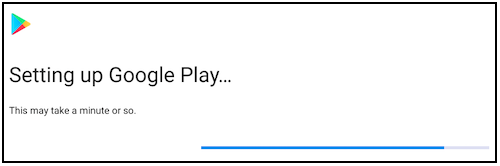
Step 3. Accept Google Play Store conditions and set up Google Play
Step 4. Next, launch the Play Store app to access the Google Play Store.
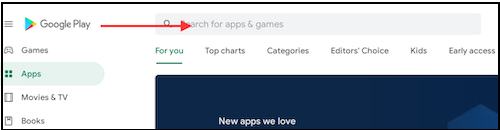
Step 5. Once you have opened the Play Store, use the search feature to find the MIT AI2 Companion, similar to how you would find an app on a phone or tablet.
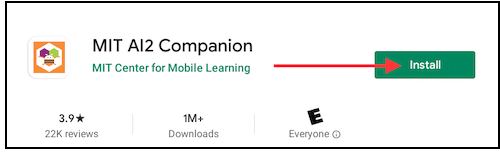
Important: If you are doing this setup during the beta testing period, the app in the Play store should be titled MIT AI2 Companion (Internal Beta). If it does not say Internal Beta, then you are probably either not enrolled in the internal beta testing group, or you are looking at the wrong version of the Companion.
Once you join the Beta program you will receive the beta version on all of your devices. The Beta version works correctly with the App Inventor production service as well as with the AI2-test.
Step 6. Click the Install button to install the Companion app. To open the MIT AI2 Companion, click on its icon in the ChromeOS menu. You can also pin this icon to the task bar for fast access in the future.
Creating apps
To create apps, use your browser to browse to the App Inventor service at ai2.appinventor.mit.edu (_during the testing period, use ai2-test.appinventor.mit.edu). Go to My Projects and start create new project in the designer and the blocks editor just as with other versions of App Inventor.
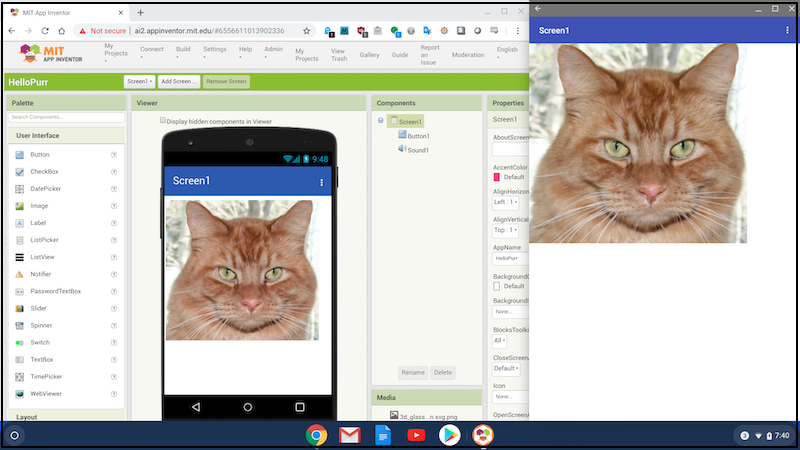
Next, go under the Connect menu at the top of the screen and choose Chromebook from the dropdown menu. The Companion should open, connected to your new app. You might want to rearrange the browser and Companion widows to appear side-by-side as shown below, to make it convenient to continue developing the app in the browser and interacting with it in the Companion window.
The Chromebook entry in the Connect dropdown appears only if you are using a Chromebook.
Building apps
Just as with other versions of App Inventor, you can package your app to produce an APK file that can run on a phone or tablet or distributed through Google Play or other sites.
Open the Build dropdown menu at the top of the browser screen. You can choose to display a QR code that can be used by a smartphone or tablet to install the app. Or you can create an apk file and save it on the Chromebook.
Installing apps
As explained above, you can use Chromebooks to build App Inventor apps and install these app on other devices or publish them to the Play Store. You can also download and install apps from the Play Store to the Chromebook.
Limitation: Currently, the Play Store is the only source from which you can download and install apps on the Chromebook. It is possible to get around this limitation, but the process is complicated and too awkward for school configurations. For information, search on the Web for “sideloading apps on Chromebooks.”
hAPPy Inventing!
Resources
MIT App Inventor


This work is licensed under a Creative Commons Attribution-ShareAlike 4.0 International License.
Terms of Service and Privacy Policy
Other inquiries: Email
GitHub: mit-cml
Accessibility: accessibility.mit.edu


