Personal Image Classifier: Part 1
Please note, this page is also available in pdf format.
In Part 1, you will train your own personal image classification model to recognize facial expressions Watch the demo video below:
1Open your browser and go to https://classifier.appinventor.mit.edu/oldpic/.
Remember - your model doesn’t know anything yet, so you need to start with training. You can track our progress with the progress bar.

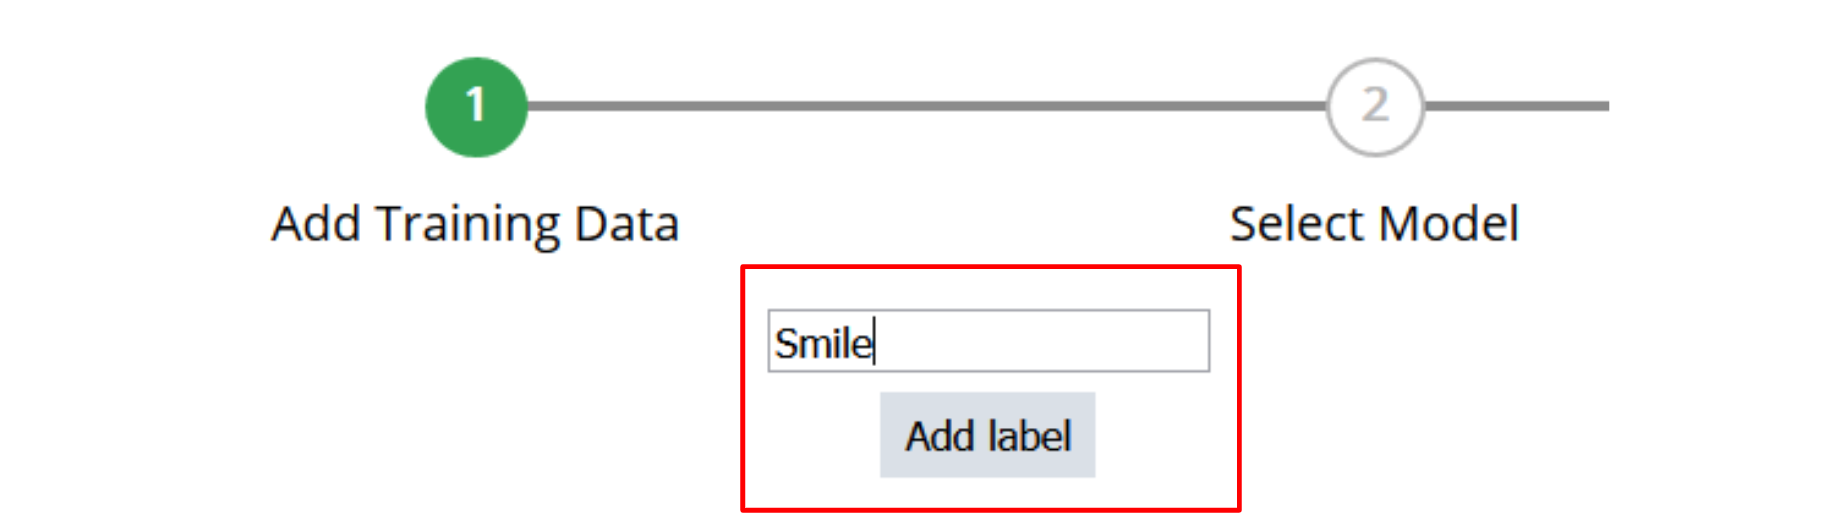
2First, add facial expressions (be creative!) for the model to learn using the add labels box. When starting out, try creating a model with just 2 or 3 expressions, but you can add as many as you’d like.
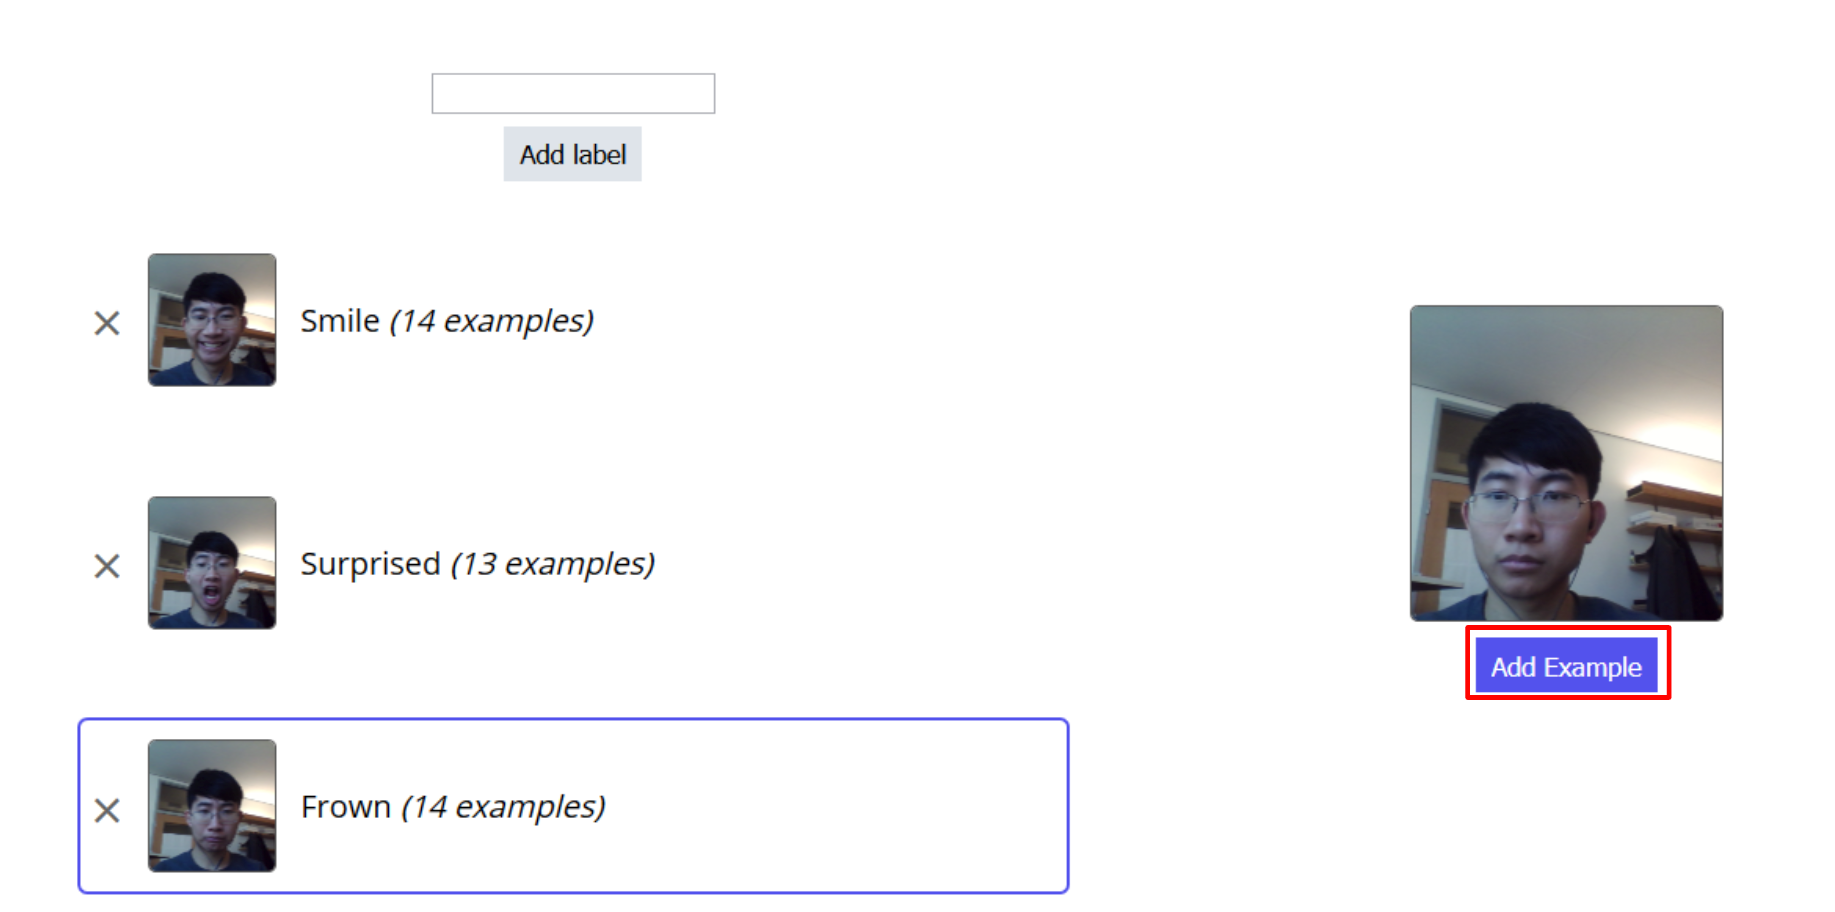
3Now, you can give examples for these labels. Click on any of your labels, pose in front of the webcam, and click "Add Example" to add an image to that label for your model to learn from (generally, more is better, but you can come back later).
4When you are satisfied with adding examples, click on the next button at the bottom to move onto the next step.
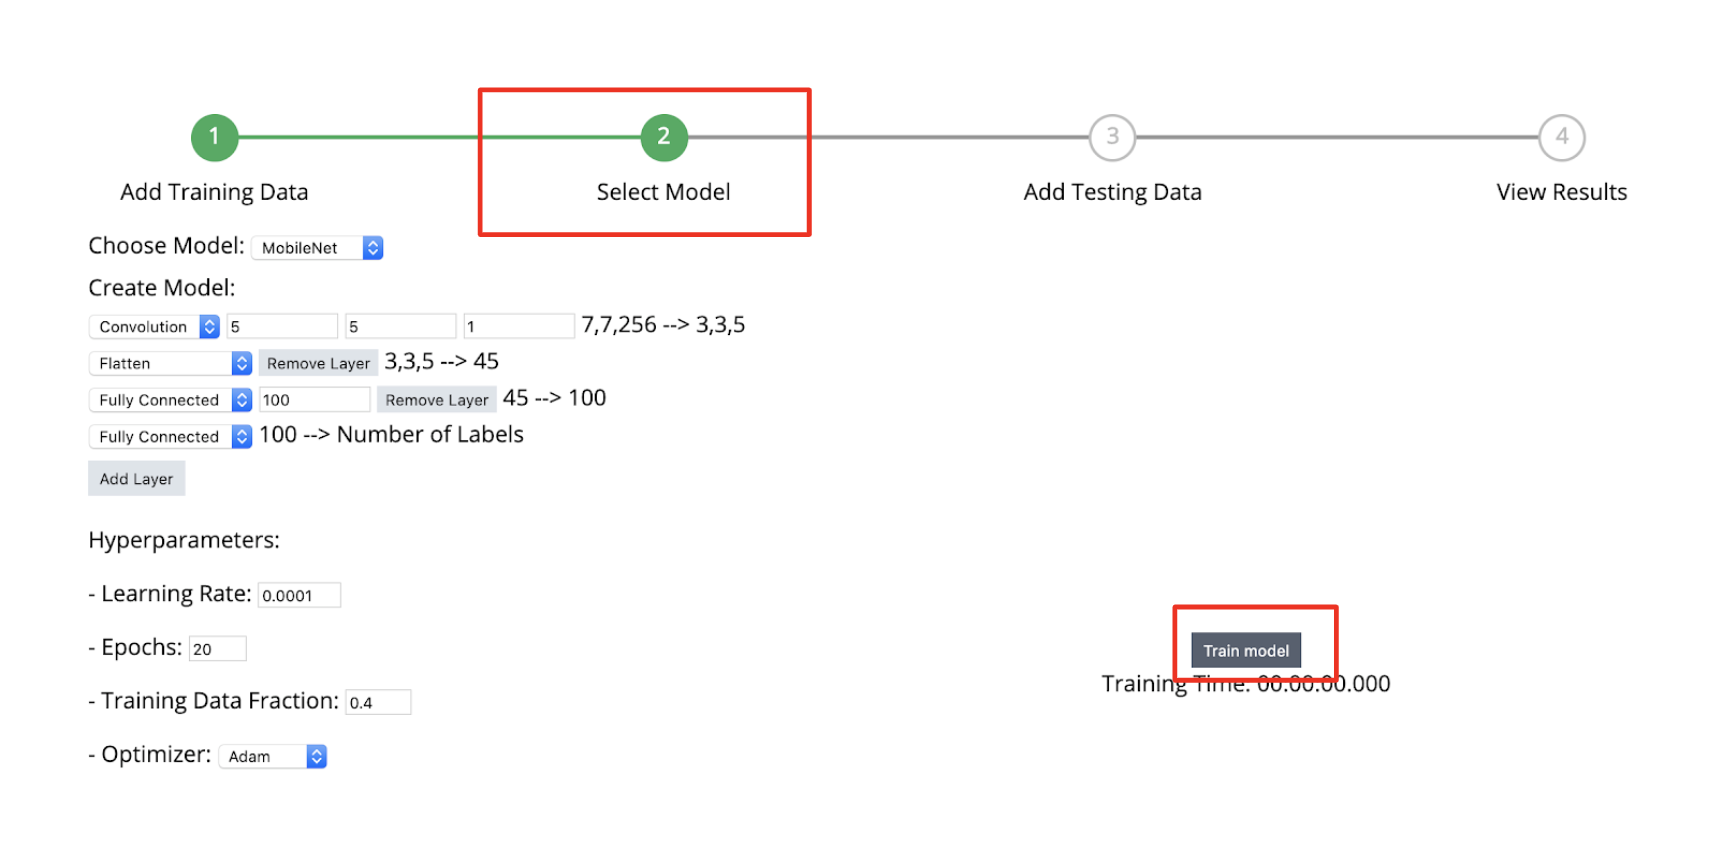
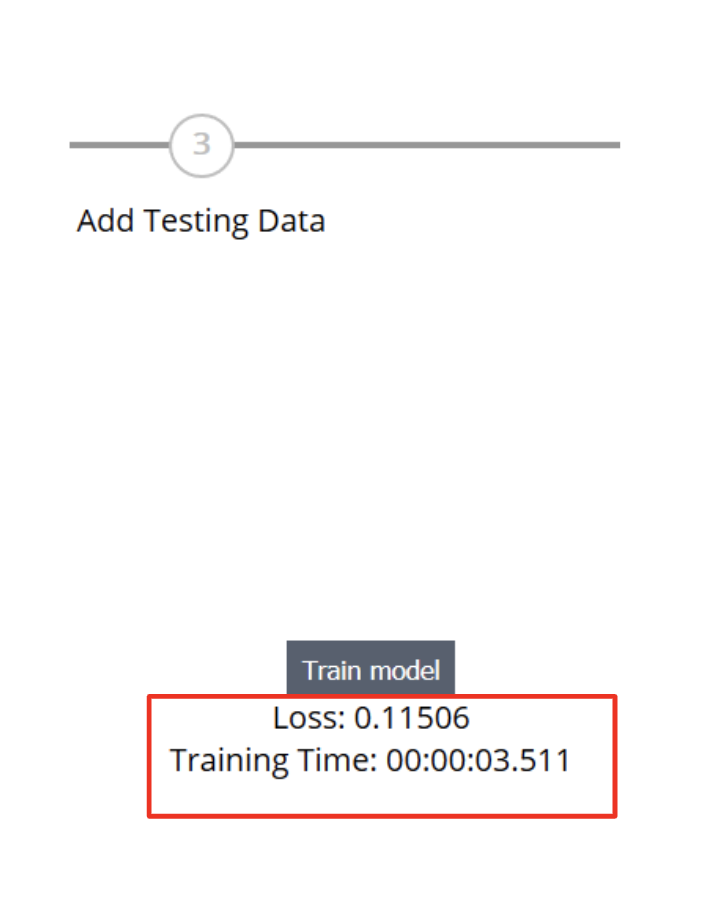
5In this step, you may change details about the model you are using. This is beyond the scope of this workshop, so just use the default settings and click “Train Model” to have the model learn the labels and images you added earlier.
6After clicking “Train Model” you can see some basic information about the training process, including how long it is taking and the “loss” of the model as the training progresses. The loss is a measurement of how well the model is performing on the images you gave it. When the training is finished, you will automatically be moved to the testing step.
Note: If training is taking a long time or slows down your browser, try starting over with fewer training examples.
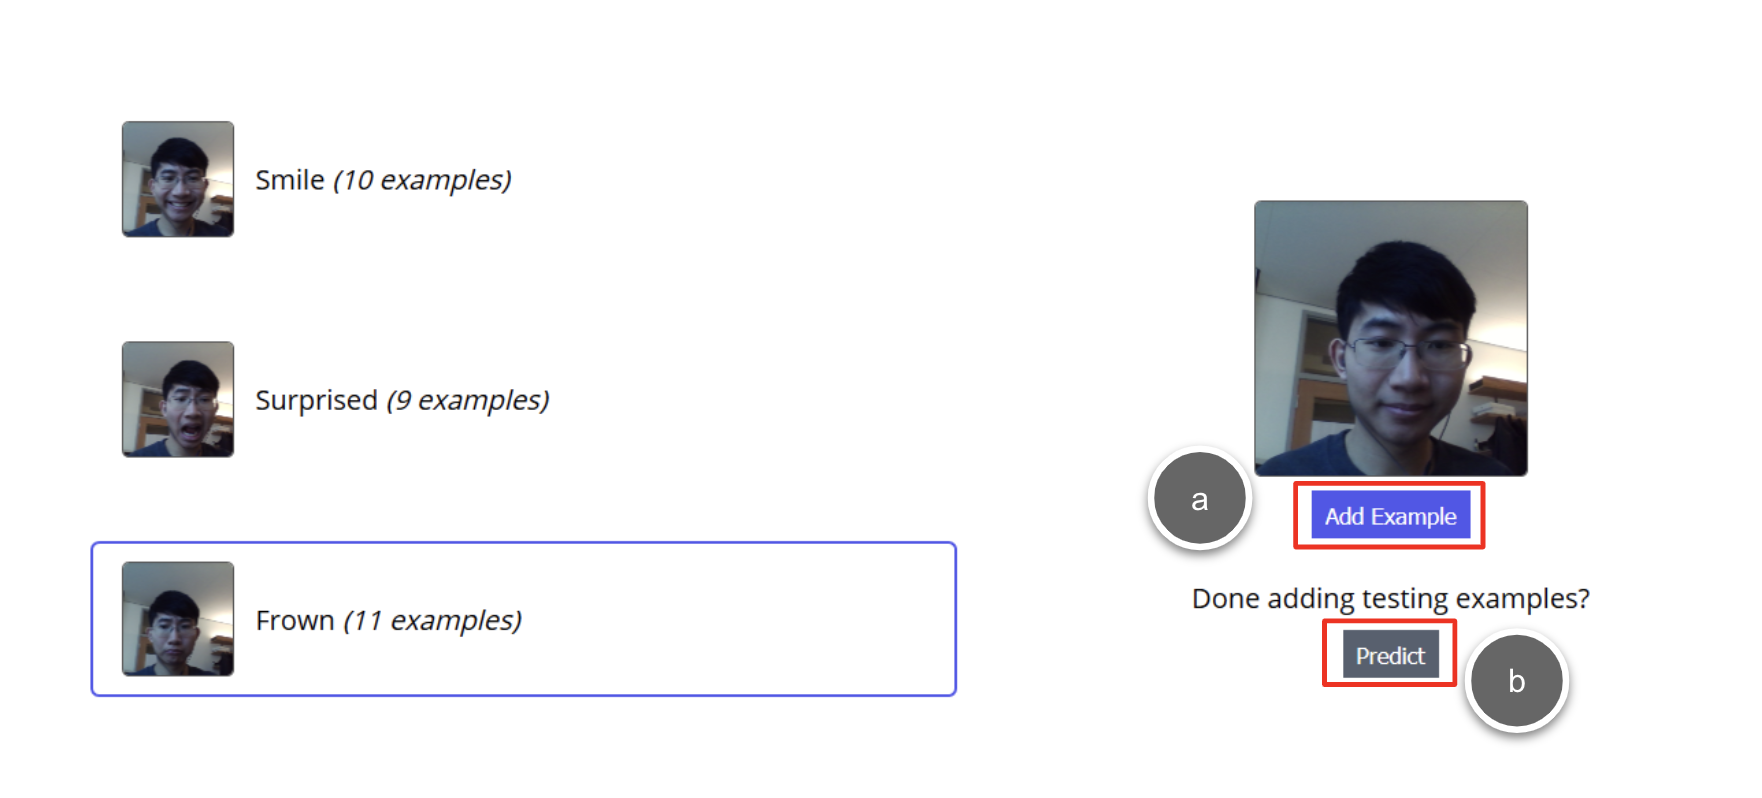
Here, you can add additional examples to test your model. This allows you to see how well your model performs on images it has not seen before.

7Adding examples in testing works the same way as in training. Just click on any of your labels and then the “Add Example” button to add an image for that label. When you are done, you can click on the “Predict” button to move on to the results step.
The results page has a few useful tools that you can use to analyze the predictions of your model on the testing images.

8Look on the left side of the screen. Start by clicking through the individual results a few times with the previous and next buttons.
Most likely, some of your testing images will be classified incorrectly.
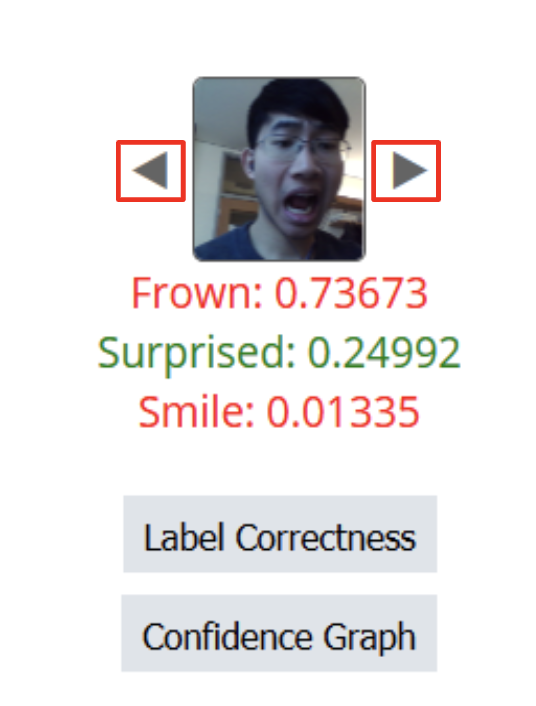
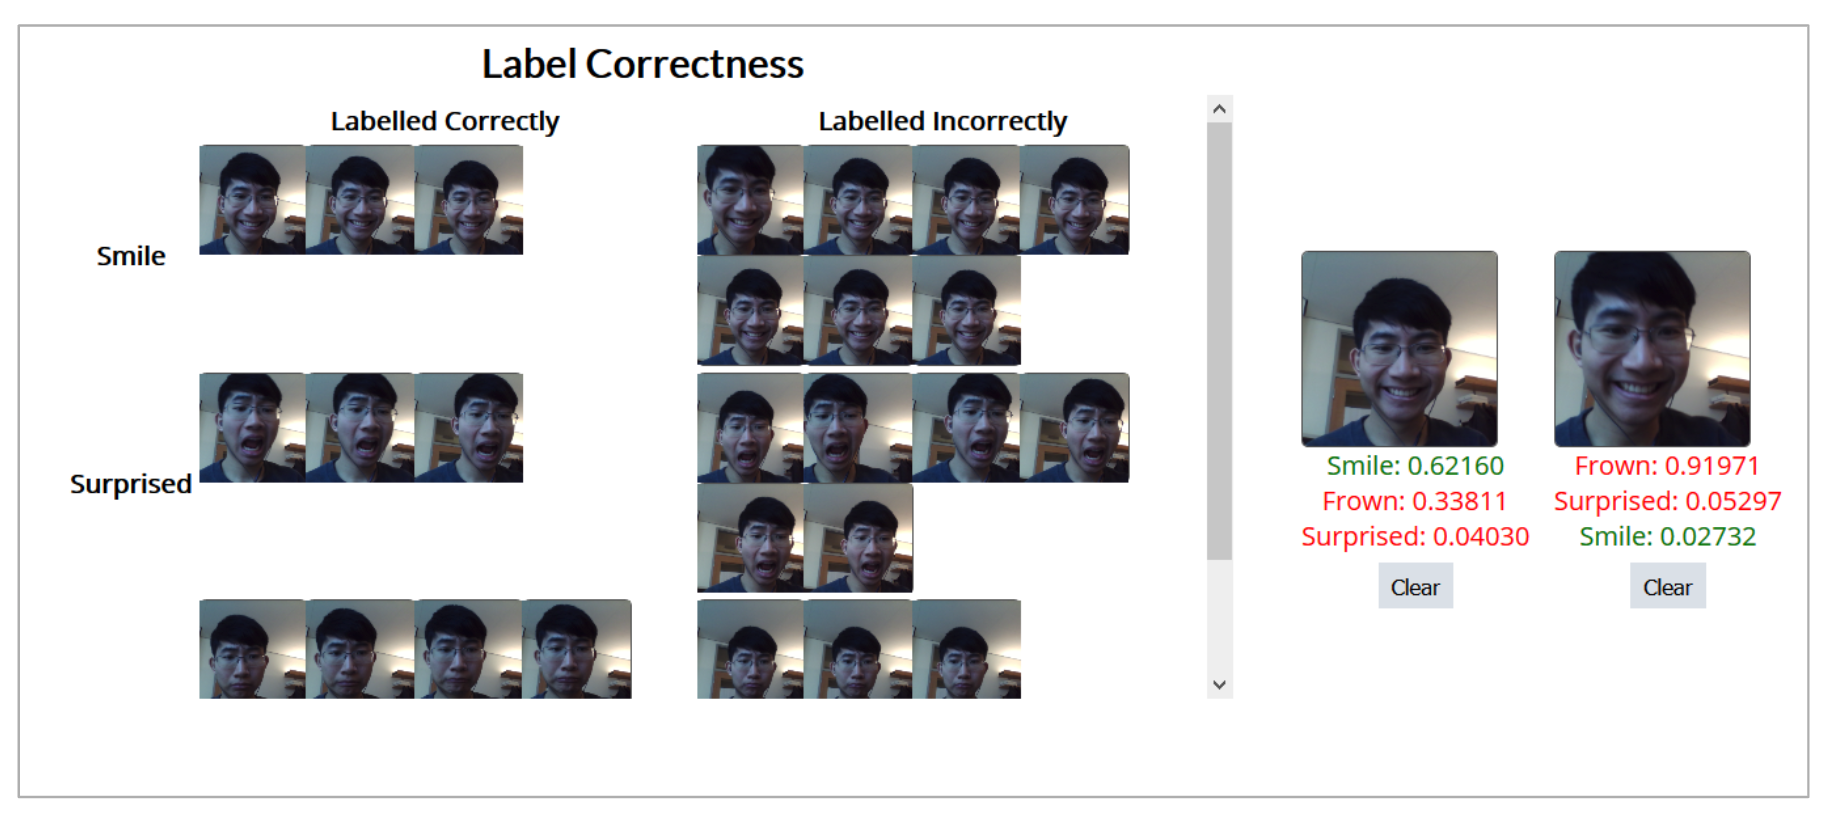
9You can use the buttons “Label Correctness” and “Confidence Graph” to display useful tools that may allow us to figure out why some images were incorrectly (or correctly) labelled. By default. “Label Correctness” is displayed in the center of this page.
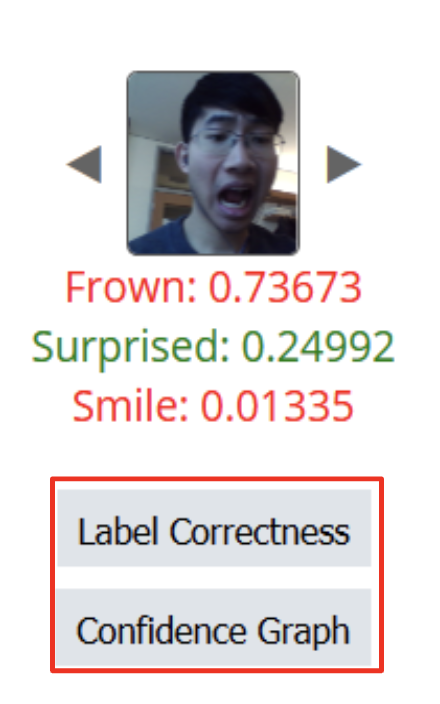
10Start with “Label Correctness”.
Label Correctness displays a table that tells you whether or not the images you added were classified correctly or not. You can compare 2 specific images at the right of the page by clicking on them.
One use for this table may be to help you figure out why 2 images of the same label were classified incorrectly (perhaps part of it looks like another label, your image is at a different angle, or something else..?). As you use these tools, try to think about why the model behaved the way it did. How might you fix the problem/improve the model?

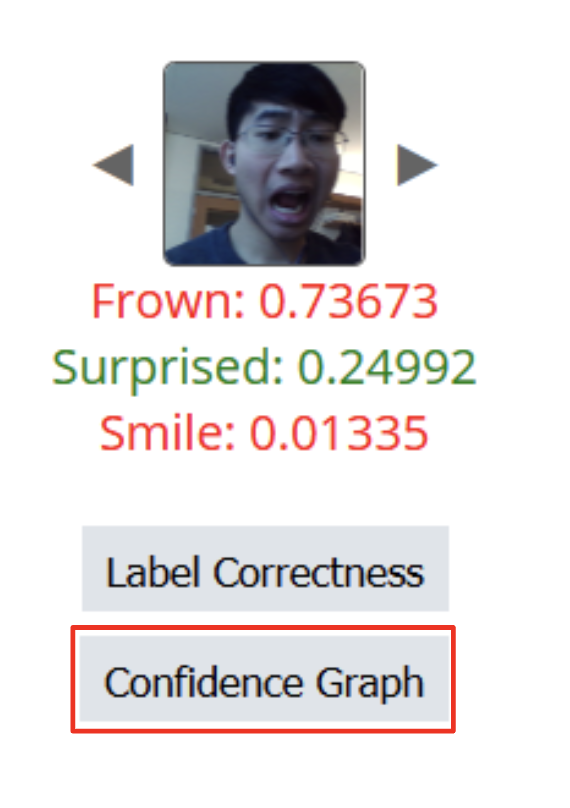
11Next, click on the “Confidence Graph” button on the left side of the screen.
12The Confidence Graph gives a rough summary of how confident the model is in predicting that a certain image belongs to a certain label. You may view each label individually using the dropdown at the top of the graph.
13Compare images of high confidence with images of low confidence. What is the difference? What do you think are the most important things about the images for your model to decide between labels (maybe face size, positioning, or something else..)?

14TheWith the help of these tools, see if you can make your model even better. Go back to the training step to add more images (possibly multiple times), or if you want, completely start over.
15Here are some exercises that we encourage you to try with your partner in the process:
- Pick a testing image that is labelled incorrectly. Why do you think it’s labelled incorrectly? Try to improve the model to predict it correctly.
- Try testing images in different conditions (eg. your faces at different distances, different parts of the screen, different backgrounds, etc.). What happens?
- Based on what you see in the analysis tools, come up with hypotheses as to why some images are being labelled incorrectly. Then, see if you can trick the model into making a wrong prediction (eg. put an image of you doing expression “A” into the expression “B” label in the testing tab and see if you can make the model think it’s really expression “B”).
- Discuss with your partner about whether or not you think you can make the model be 100% accurate. If so, how? If not, what do you think is “good enough”?
16When you are satisfied with your model (or when time is up), download it with the “Download Model” button on the bottom right. Get excited to use the model you just built in an app!

MIT App Inventor


This work is licensed under a Creative Commons Attribution-ShareAlike 4.0 International License.
Terms of Service and Privacy Policy
Other inquiries: Email
GitHub: mit-cml
Accessibility: accessibility.mit.edu


