Starting App Inventor for the First Time
App Inventor Classic • App Inventor Classic • FOR APP INVENTOR 2 CLICK HERE• App Inventor Classic • App Inventor Classic
Starting App Inventor
Before you begin, make sure you have access to the following things:
- Internet
- A Gmail account (this is how you will log in to App Inventor)
Start the Designer and create a new project
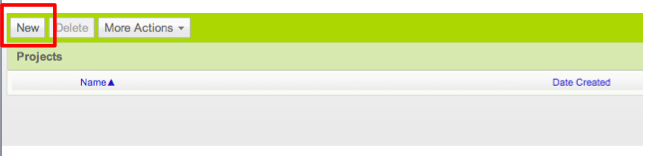
In your web browser, go to the App Inventor website at http://beta.appinventor.mit.edu/. If this is the first time you are using App Inventor, you will see a blank projects page.
- Click New on the left side, near the top of the page.
- Enter the project name HelloPurr (one word, with no spaces) in the dialog box that appears, then click OK.
The browser will open the web page called the Designer, the place where you select components for your app and design the user interface, and should look like this:
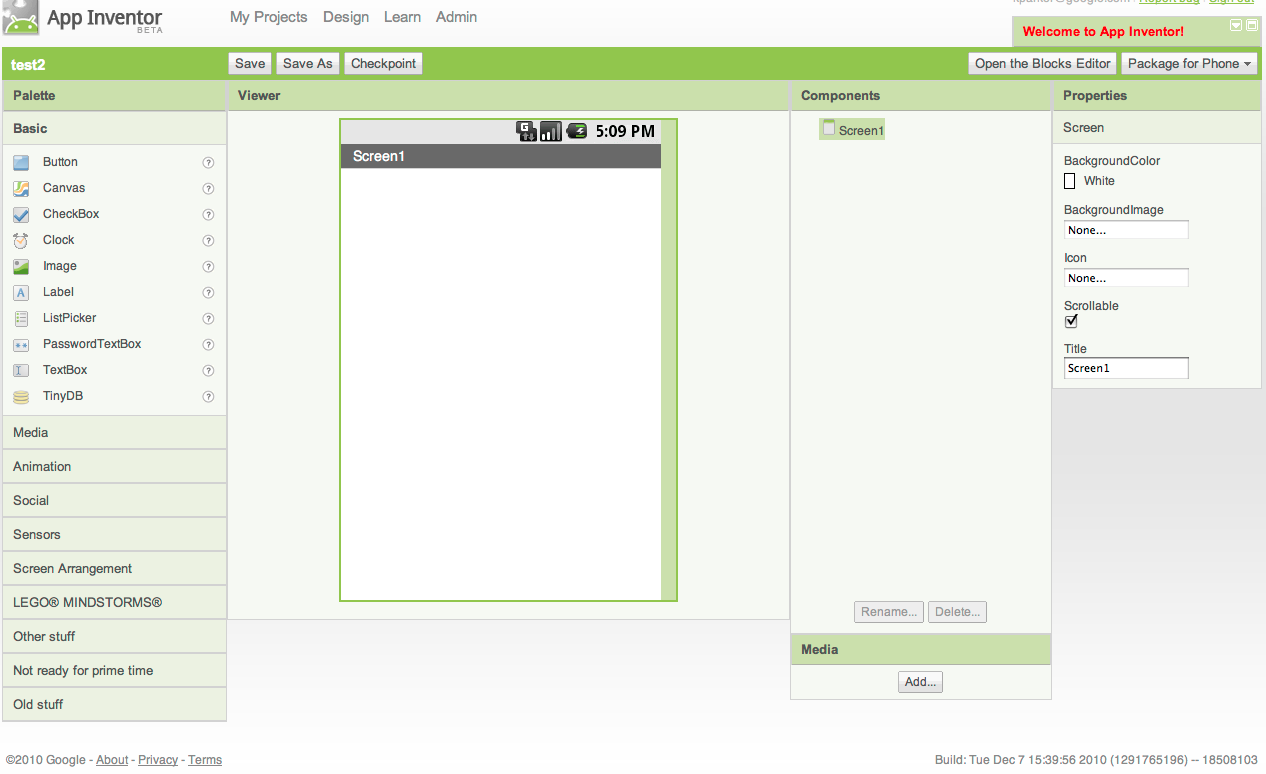
In addition to the Designer, you need to start the Blocks Editor, the place were you set the behavior of the app. It is a separate application with its own window, and therefore we need to open two windows to design an app. These windows are linked: changes made in the Designer will be immediately reflected in the Blocks Editor.
Starting the Blocks Editor
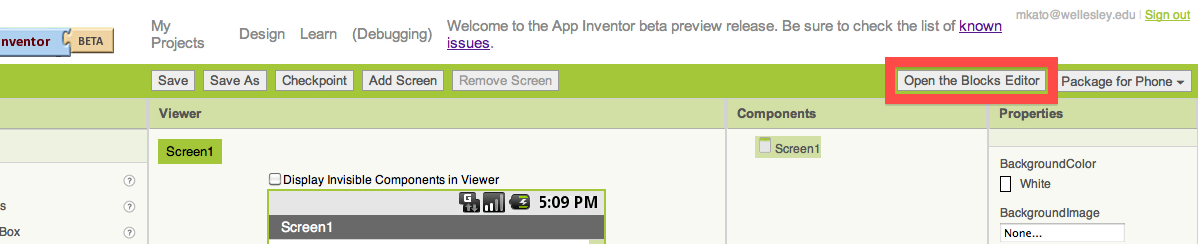
When you click Open the blocks editor from the Designer window, the Blocks Editor program file should download and run.

You may be prompted to accept the Blocks Editor file. Click "save", "allow", "keep", or whatever type of acceptance button comes up (it depends on your computer and browser). For Windows users, follow the instructions as the automatic installation wizard suggests. To open the Blocks Editor:
- Click 'OK' (Open the Java file)
- Click 'Always trust contents from this publisher' and open the file
- Click 'Run'
This process may take 30 seconds or longer. If the Blocks Editor fails to open, one possible reason is that your browser is not set up to run downloaded Java applications automatically. To account for this possibility, find the downloaded file named AppInventorForAndroidCodeblocks.jnlp and open it. The Blocks Editor window should look like this:
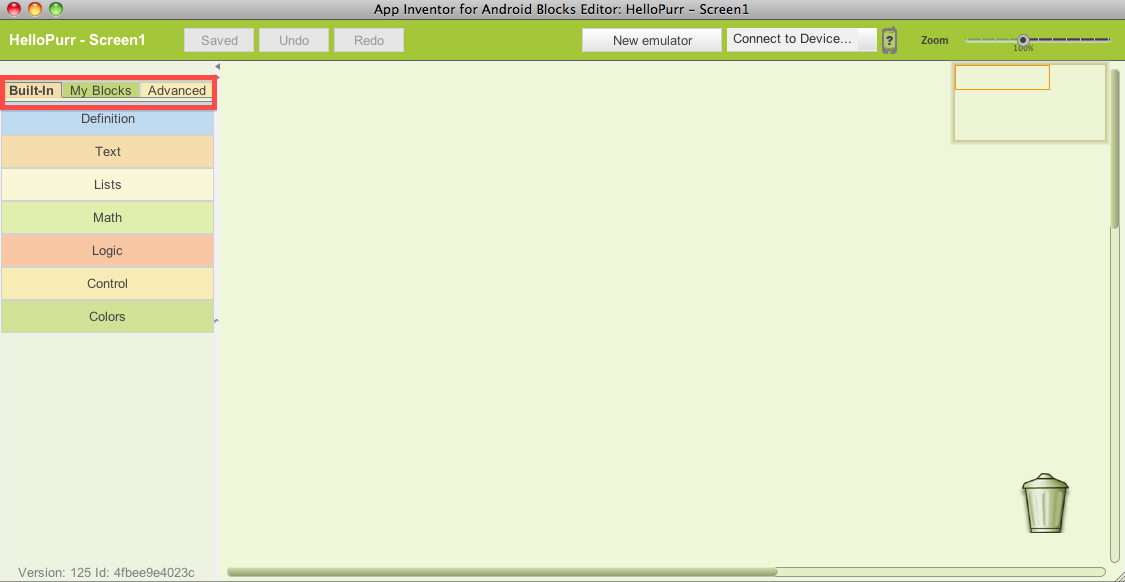
The large empty "canvas" space on the right side is referred as the work area, in which you place blocks to assemble the program.
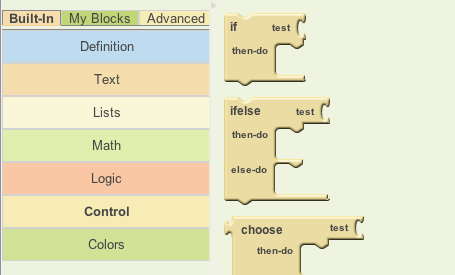
On the left side, it has three palettes (Built-In, My Blocks, Advanced); each palette has drawers storing sets of blocks. When you click a drawer, you can see all the blocks stored in that drawer. You can scroll down to see more blocks.
The Built-In palette contains the standard set of blocks that are available for every app you build (e.g., Definition, Text, Lists etc.). The blocks under the My Blocks palette contains specific blocks that are tied to the set of components that you have chosen for your app. The Advanced palette contains blocks for inventing intermediate and advanced apps with more complex logic.
The Designer runs from the browser, and the Blocks Editor runs from Java; however, they are linked. Therefore, even when you close your Blocks Editor window, all the information in the Blocks Editor is stored in the Designer. When you click the "Open the Blocks Editor" button, a new .jnlp file is downloaded to your computer, and you need to open the file again. When a new Blocks Editor opens, it will contain all the blocks you programmed before you closed the Blocks Editor.
As you build your app, you can do "live testing" on an emulator or an Android device. If you do not have an Android device, you can still see your app as you develop it, but with an on-screen "emulator" that comes with App Inventor (you've already installed it when you installed App Inventor).
MIT App Inventor


This work is licensed under a Creative Commons Attribution-ShareAlike 4.0 International License.
Terms of Service and Privacy Policy
Other inquiries: Email
GitHub: mit-cml
Accessibility: accessibility.mit.edu


