When you use App Inventor for a while and become familiar with all its possibilities, you might want to spread the word. Of course, you can give people a demo or the link to AppInventor.mit.edu, but that might not be enough to get them really going even though they are interested. At least, that is my experience.
Because I was asked a few times to come and tell about App Inventor, I developed this practical presentation for adults. Not to teach strictly about Computer Science but to get people as enthusiastic as I became about App Inventor. The presentation is a Show & tell kind of way, with which you can introduce App Inventor and demonstrate some examples. Therefore, besides this presentation, activate App Inventor in another window to switch back and forth quickly.
| Show | Tell |
|---|
| Slide 5. | |
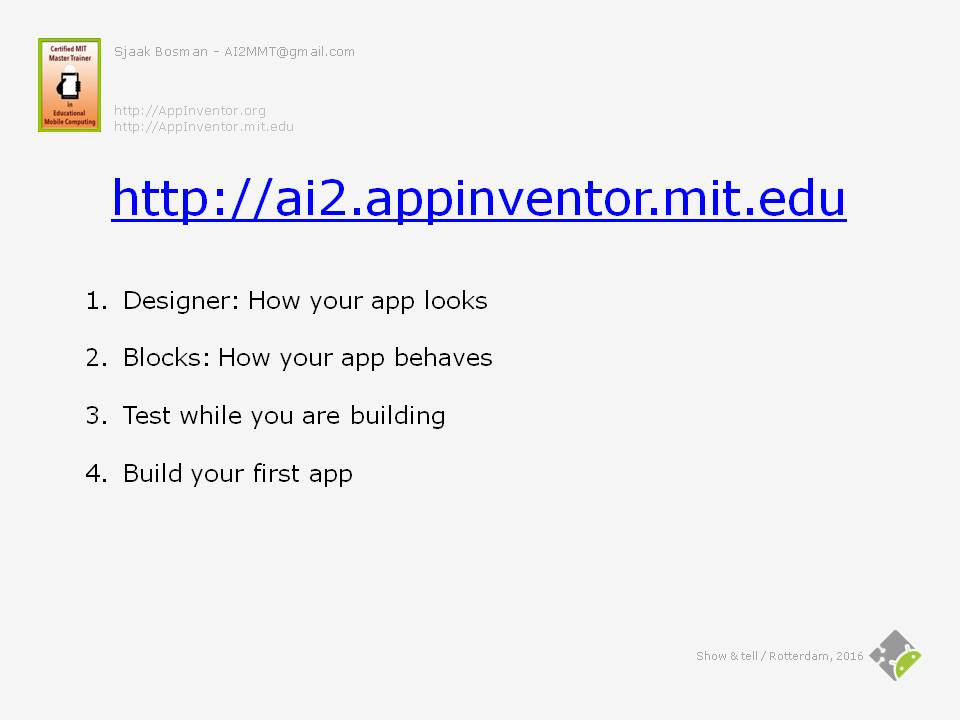
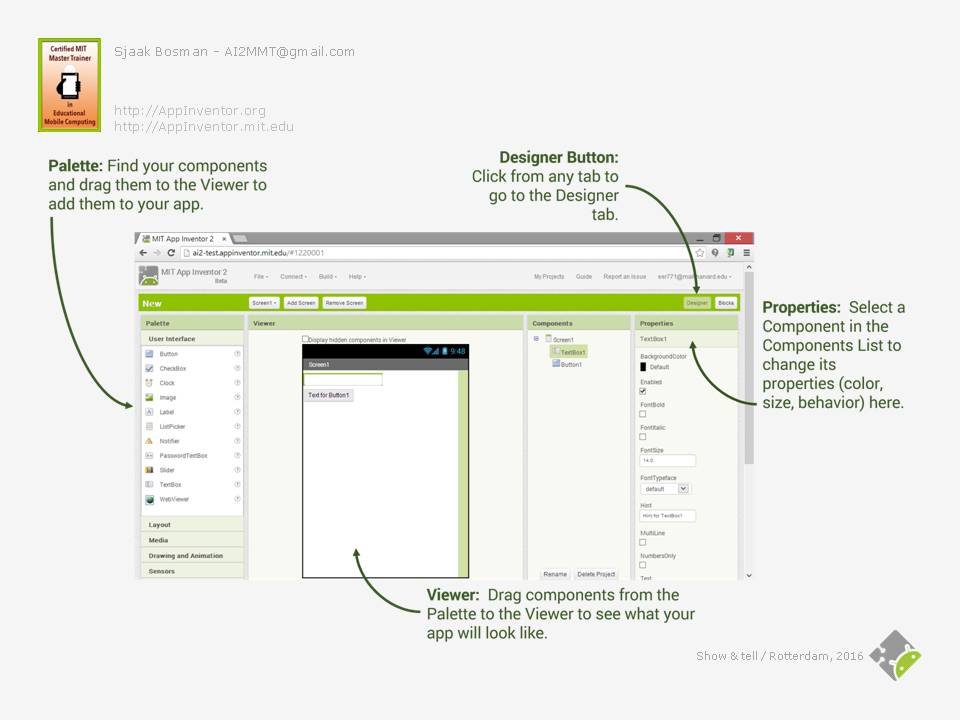
| Step 1. |
| In the Designer window you design the User Interface of your app: |
| Explain the 5 different panes briefly. | |
| 1. Palette: Containing all the components that can be included in the app.
The components are arranged in several categories, such as User Interface and Layout. |
| 2. Viewer: The appearance or User Interface of the app. |
| Switch to the App Inventor window. | |
| Click Start new project. Name it New. Wait until the Designer window shows up and demonstrate how to put the textbox and button in the viewer. | |
| Switch back to the presentation. | |
| 3. Components: A list of components that are included in the app. |
| 4. Properties: A list of properties of the component that is selected in the Components pane. |
| Switch to the App Inventor window. | |
| Demonstrate how to change properties, for example enable FontBold of Button1 and change the text to Speak!. Also explain de Designer and Blocks Button (as preparation for the next slide). | |
| Switch back to the presentation. | |
| 5. Media (not on the screenshot): A list of all media files, such as images and sounds, that have been uploaded into the app. This will be addressed during an optional workshop. |
| Show | Tell |
|---|
| Slide 6. | |
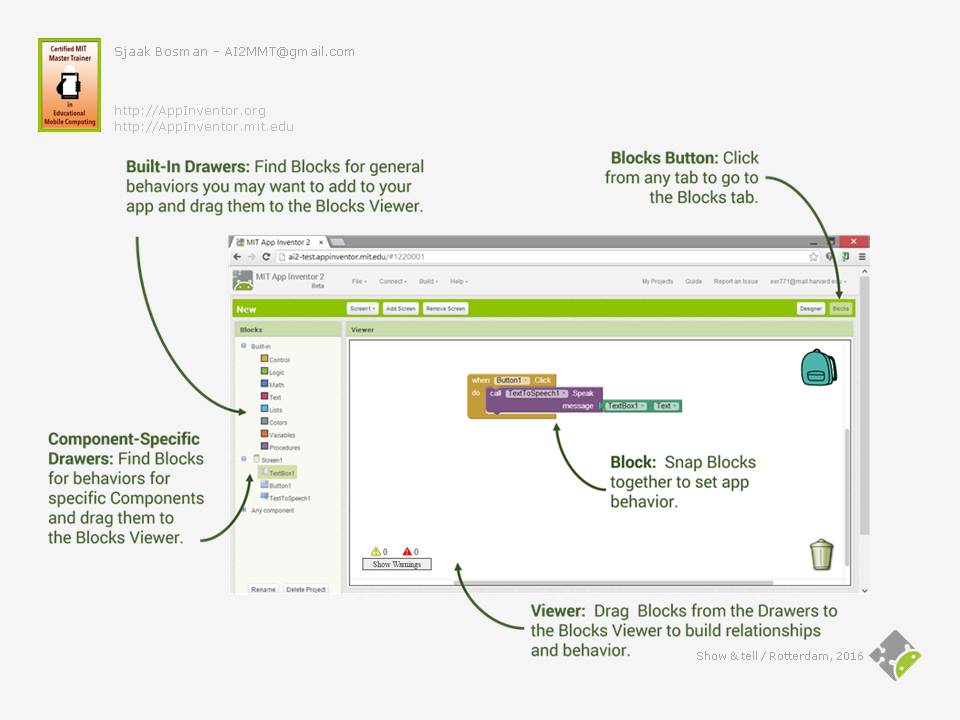
| Step 2. |
| In the Blocks window you design the behavior of your app: |
| Explain the 2 different panes briefly. | . |
| Step 2. |
| 1. Blocks: Containing all the code blocks that can be included in the app.
The blocks are arranged in 3 categories, Built-in, Component Specific and Any component. |
| 2. The code blocks or source code of the app.
With the blocks you program the behavior of your app. |
| Switch to the App Inventor window. | |
| Click the Blocks Button and demonstrate how to put the Button1.Click event handler, TextToSpeech procedure call (Because the TextToSpeech component is not available at first, use the Designer mode to include this non-visible Media component.) and Textbox.Text property in the viewer. | |
| Switch back to the presentation. | |
| If the situation allows, you could talk a little more about event handlers and procedure calls and their purposes and behaviors. But be careful, it can become too difficult quickly. Slide 8, section import a project from the gallery, gives you the opportunity to demonstrate procedures. |
| Show | Tell |
|---|
| Slide 8. | |
| Step 4. |
| Actually, we just built our first app, New, from scratch. There are three additional methods to create an app: |
| First, one can import an app from a repository. At the moment there are only two projects in the default repository. |
| Switch to the App Inventor window. | |
| Select Import project (.aia-file) from a repository in the Projects-menu. Select the HelloPurr app. Name the components (Button1 and Sound1) and discuss what the app probably will do. Reset the connection and restart the MIT AI2 Companion app to demonstrate HelloPurr | |
| Wouldn't it be nice if the cat purrs when the smartphone is being shaken? App Inventor comes with lots of sensors, like the accelerometer sensor which detects movements of the smartphone. Of course the actual sensors are hardware components in the smartphone, and App Inventor provides software interfaces to them. For the sake of easiness we just call the software interfaces sensors too. |
| Switch to the designer in the App Inventor window. | |
| Add the AccelerometerSensor1 sensor. Switch to the blocks and add the AccelerometerSensor1.Shaking event handler. Copy both blocks in the Button1.Click event handler to the AccelerometerSensor1.Shaking event handler. Demonstrate HelloPurr again to reflect the changes. | |
| Switch back to the presentation. | |
| Second, one can import a project from the gallery. The gallery is a place where one can share his or hers project. You can find thousands of apps in the gallery. So why start from scratch? |
| Switch to the App Inventor window. | |
| Select the menu option Gallery. Search for Simple Hands-Free Counting App and click OPEN THE APP and click OK. Demonstrate the app on your smartphone. If necessary, reset the connection and restart the MIT AI2 Companion app. Take a brief look at the User Interface and blocks structure to explain what you demonstrated.
| |
| This project includes a variable, that gives you the opportunity to explain what variables are. Also, all 3 event handlers contain the same blocks, which give you the opportunity to introduce procedures. Depending on the audience, you can discuss this. | |
| Switch back to the presentation. | |
| Third, you can import a project from your computer. Likewise, you can store a project on your computer. This option will be addressed elsewhere. |
| Show | Tell |
|---|
| Slide 9. | |
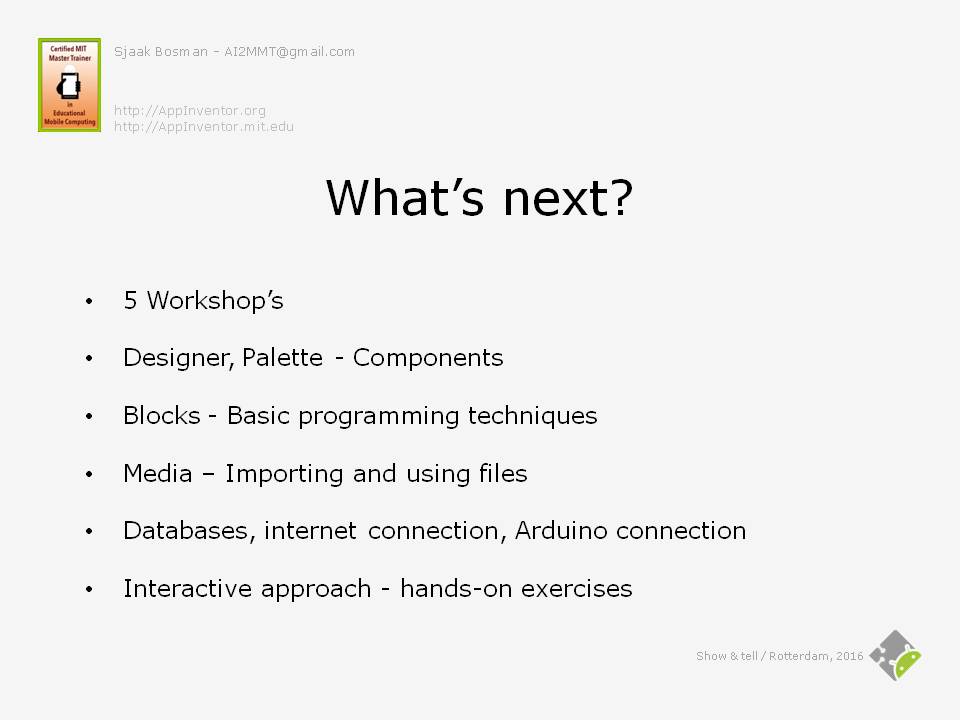
| There is, of course, a lot more to tell, explore and invent about App Inventor. So why wont you give yourself a flying start by attending a program of 5 additional workshops? The workshops will address a lot of aspects of App Inventor, such as: |
| - Designer, Palette: Most of the components will be explained and demonstrated in examples.
|
| - Blocks: You will become more familiar with all sorts of blocks, to program the behavior of your app. Several basic programming techniques will be showed to make and keep your program maintainable and readable.
|
| - Media: Importing and using files such as images and sounds.
|
| - One workshop will be dedicated to an introduction to databases, internet connection and Arduino connection
|
| - Interactive approach: During the workshops there will be a lot of hands-on exercises, so you can explore App Inventor yourself and ask questions to give you a flying start.
|
| Of course you can change the workshop content as you like. | |
 This is a guest blog by MIT Master Trainer Sjaak Bosman