Space Invaders
What You're Building
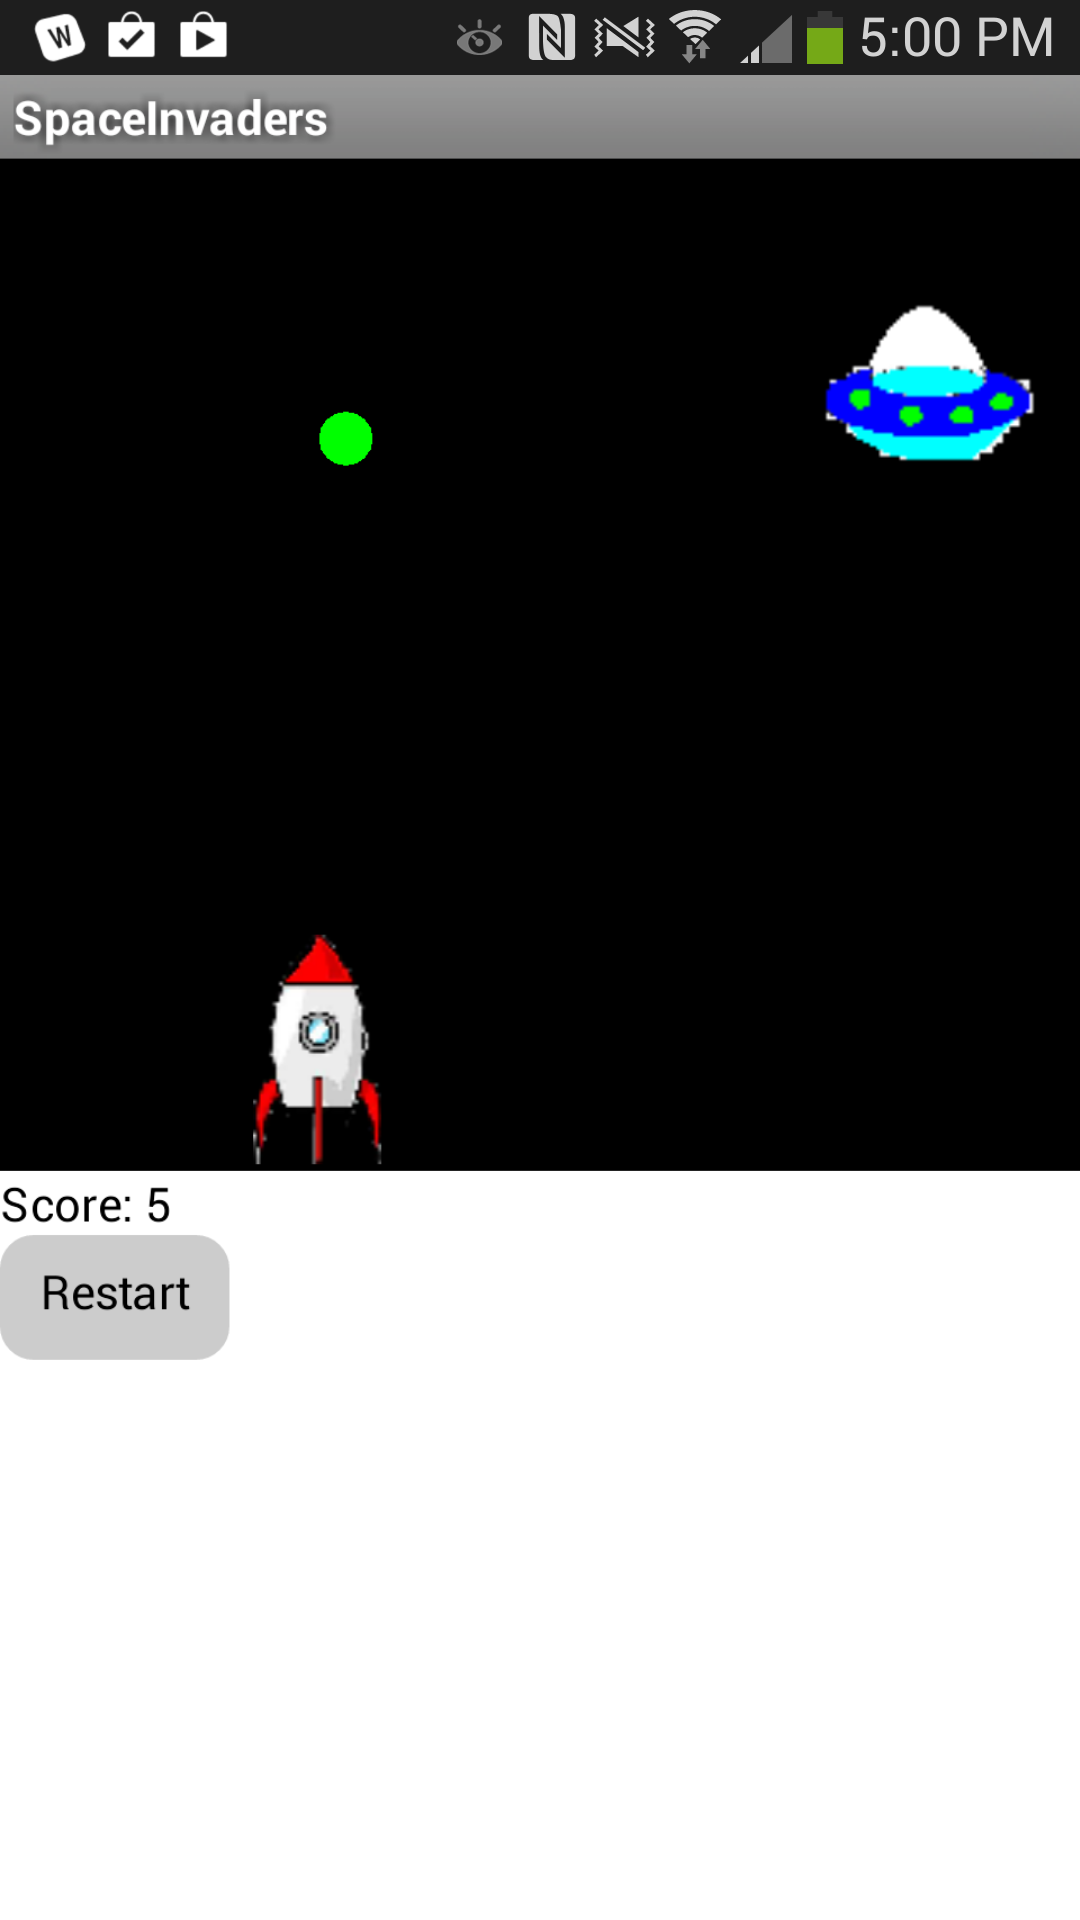
By building the Space Invaders App you will get practice with using Clock components and Timers, using Animation components such as Image Sprites and the Canvas, setting visibility, and detecting collisions in App Inventor. You'll program an application that has a shooter ship whose goal is to shoot all the flying saucers on the screen.
Getting Started
Connect to the App Inventor web site and start a new project. Name it SpaceInvaders, and also set the screen's Title to "SpaceInvaders". Connect to a device or emulator.
Introduction
This tutorial introduces the following skills, useful for future game development:
- Using the Clock component
- Using Clock.Timer to move sprites
- Using Sprite.Flung to move a sprite
- Using collision detection
- Setting visibility of sprites
Getting Ready
For this game, you will have two types of sprites: an imagesprite represented by a shooter ship and flying saucers represented by a ball sprite. Click below to download the image files for your rocket ship sprite and flying saucer sprite.

Set up the Components
Use the component designer to create the interface for SpaceInvaders. When you finish, it should look something like the snapshot below (more detailed instructions below the snapshot).
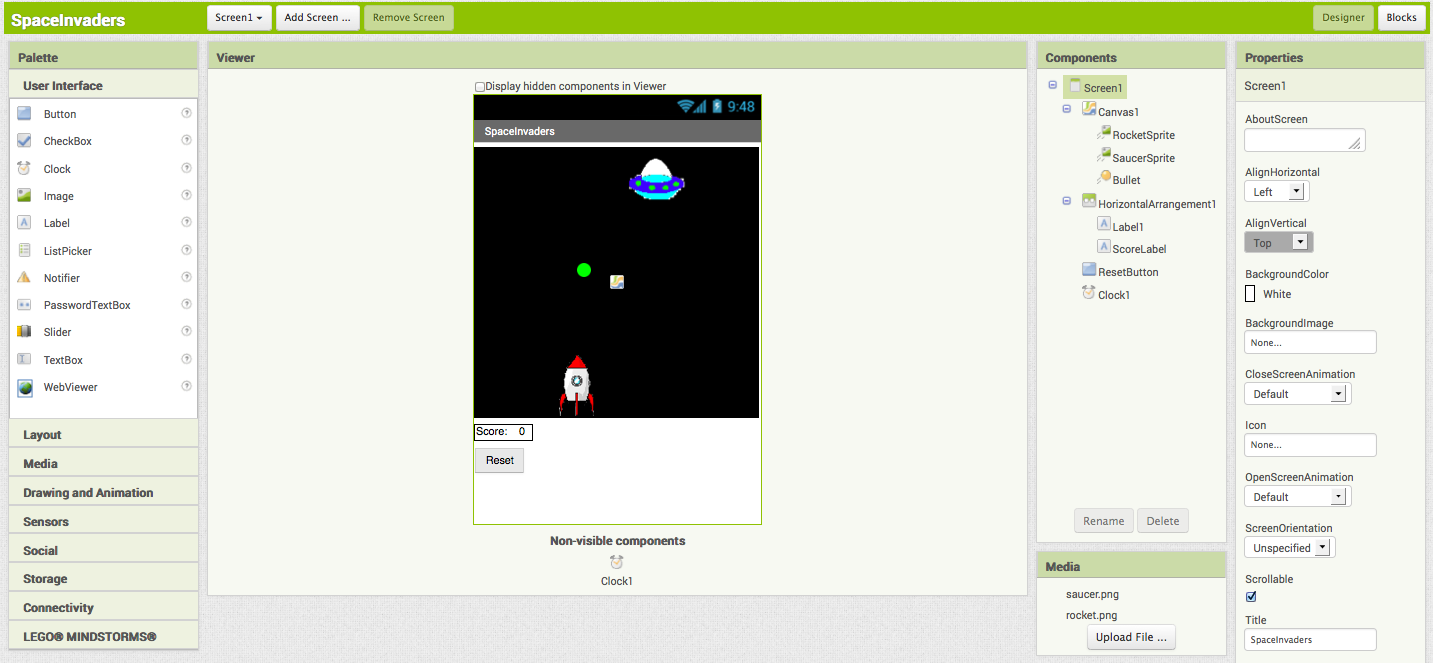
To create this interface, put the following components into the Designer by dragging them from the Component Palette into the Viewer and set the properties of the components as described below:
| Component Type | Palette Group | What you'll name it | Purpose of Component | Action |
| Canvas | Drawing and Animation | Canvas1 | The background that we will be putting our sprites on | Change Width property to "Fill parent" and Height property to 300. Set the BackgroundColor property to Black. |
| ImageSprite | Drawing and Animation | RocketSprite | The rocket ship in our game | Upload the rocketship image and set the Picture property to "rocket.png". Set the Y property to 230. This will place the rocket at the bottom of the canvas. |
| ImageSprite | Drawing and Animation | SaucerSprite | The flying saucer in our game | Upload the saucer image and set the Picture property to "saucer.png". |
| BallSprite | Drawing and Animation | Bullet | The bullet from the rocket ship. | Change PaintColor to Green and set the Radius property to 8. |
| Clock | User Interface | Clock1 | We use the Clock for its Timer method to move the the saucer | Change TimerInterval property to 3000. |
| Horizontal Arrangement | Layout | HorizontalArrangement1 | To contain Label1 and ScoreLabel | |
| Label | User Interface | Label1 | To contain the word "Score: " | Change Text property to "Score: ". |
| Label | User Interface | ScoreLabel | To contain the current numerical score | Change Text property to "0". |
| Button | User Interface | ResetButton | To reset the game so the player can play again | Change Text property to "Reset". |
Now that you have all the essential properties configured, feel free to change the colors of any components that you want to.
Moving the rocket
In this game, the user will move the rocket from side to side. This means we will only be changing the X-direction of the rocket sprite. To do this we will use the RocketSprite.Dragged event handler. When the rocket is dragged, we will adjust it's X property to be the currentX that we dragged the sprite to.
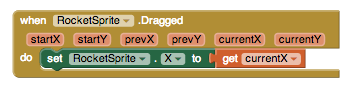
Once you put these blocks together, connect your phone and test this feature out!
Programming the Bullet's Behavior
There are several features we want our bullet to have in this game. We want it to shoot from the rocket, collide with the saucer, and be invisible after the collision and before being shot.
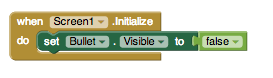
Let's start by using the Screen1.initialize block. When the screen is initialized, we will program the bullet to be invisible. We do this by setting the bullet's visibility property to False.
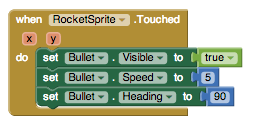
Next, we want to make sure that the bullet appears again when we shoot from the rocket. When we touch the rocket, we want the bullet to start heading towards the saucer. We will do this by using the RocketSprite.Touched event handler. When the rocket is touched, we not only want to set the rocket to be visible, but we also want to set the speed and heading of the rocket. Heading is a value from 0 to 360 that indicates what direction the sprite should be moving towards. 0/360 is to the left, 90 is up, 180 is right, and 270 is down. The speed is measured in pixels/sec.
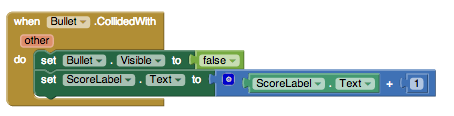
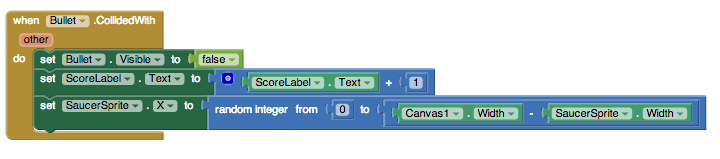
The last thing we need to program is what happens when the bullet hits the saucer. We will use the Bullet.CollidedWith event handler. This event is called whenever the bullet collides with another sprite. Since our rocket sprite is locked into a Y at the bottom of the screen, the bullet will never collide with the rocket and only with the saucer. On collision we want two things to happen. 1. The score should increase by 1. 2. The bullet should become invisible.
If you have started testing this game out, you may have noticed that once you shoot the bullet, it doesn't appear to let you shoot it again. We need to program the bullet to return to the place in front of the rocket when we shoot it. We can do this using the Bullet.MoveTo block.
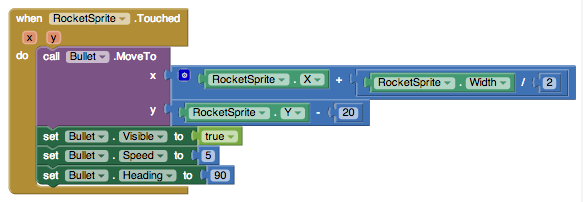
Now, test it out!
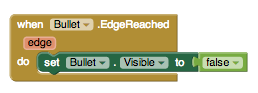
You may have noticed that if you miss the saucer, the bullet moves to the top of the screen and gets stuck there until you try shooting again. To make the bullet disappear when it hits the top edge of our canvas, we need to use the Bullet.EdgeReached event handler.
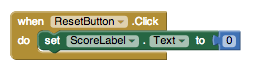
Programming the Reset Button
Sometimes, users might want to restart the game and reset their score. When this happens, we need to set the score back to 0.
Increasing the Difficulty -- Changing the Position of the Saucer
Let's make the game a little more challenging! Now, when the bullet collides with the saucer, let's change the location of the saucer. The saucer will keep the same Y value so we'll only have to change the X. We can do this by using the random block.
To make it even more difficult, we'll also change the position of the saucer when the Timer goes off.

Complete Program
Here's the complete SpaceInvaders program.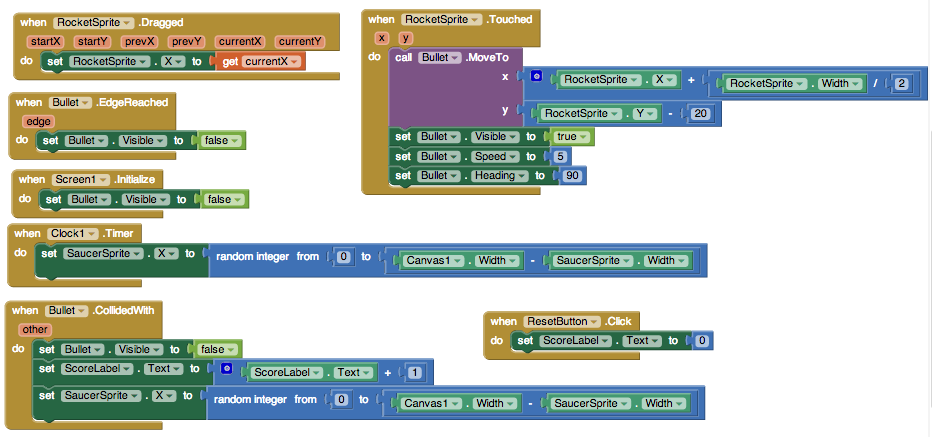
MIT App Inventor


This work is licensed under a Creative Commons Attribution-ShareAlike 4.0 International License.
Terms of Service and Privacy Policy
Other inquiries: Email
GitHub: mit-cml
Accessibility: accessibility.mit.edu


